Archived Blog Posts
Be Prepared: The Equipment and Safety Plan Your Business Needs to Avoid a Fire Disaster | SERVPRO of Mid-City San Diego
10/15/2024 (Permalink)
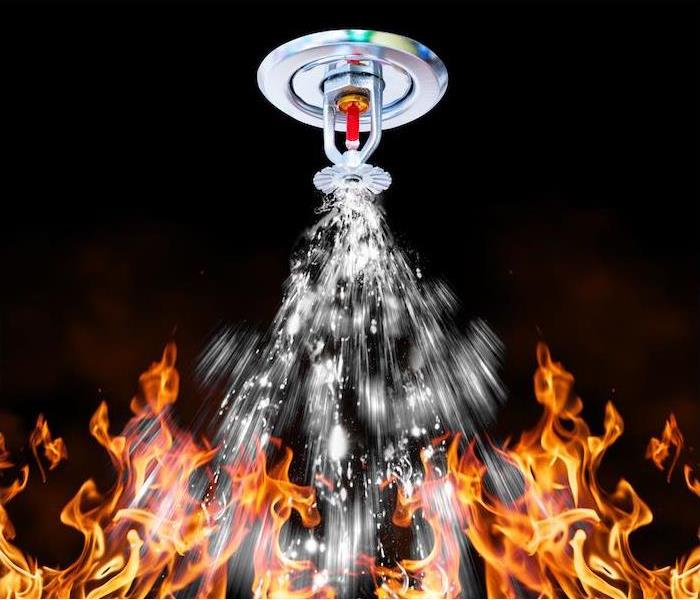 Protect your business with a safety plan! Contact SERVPRO® for expert guidance on fire prevention and ensure your employees and property stay safe.
Fires can be devastating for businesses, and in San Diego, fire risks are present all year round. The dry summer and fall months in particular can see a rise in fire-related incidents. As a business owner, preparing for a potential fire disaster is critical to ensuring the safety of your employees and minimizing damage to your property.
Common Causes of Business FiresAccording to the National Fire Protection Association (NFPA), fires in businesses are most commonly caused by electrical faults, heating equipment, and cooking appliances. In San Diego’s Mid-City area, the warm climate during the summer and fall can heighten the risk of fires due to overworked air conditioning units and the dry conditions outside. These seasonal risks make it even more important to ensure your business is properly equipped to handle fire-related incidents.
Must-Have Fire Prevention Equipment for BusinessesHaving the right equipment in place is essential to reducing the risk of fire and protecting your business. Here’s a checklist of must-have fire prevention equipment:
Fire Extinguishers: These are the first line of defense in the event of a small fire. Ensure they are placed in easily accessible locations, and train employees on how to use them.
Smoke Detectors and Fire Alarms: Smoke detectors and alarms should be installed in key areas of your business, such as break rooms and office spaces. Regular testing and maintenance are crucial to keeping them in working order.
Sprinkler Systems: A reliable sprinkler system can help control and minimize fire damage, especially in larger commercial spaces. Ensure your system is tested and serviced annually to maintain functionality.
Fireproof Safes: Important documents, digital backups, and expensive equipment should be stored in fireproof safes to ensure their protection in case of fire.
Create a Fire Safety Plan for Your BusinessPreparation is key to minimizing the impact of a fire on your business. A clear, well-thought-out fire safety plan should include:
Evacuation Routes: Mark exits and ensure that all employees are familiar with evacuation routes. Conduct regular fire drills to keep everyone prepared.
Employee Training: Make sure your employees are trained on fire safety protocols, including how to use fire extinguishers and when to evacuate.
Emergency Contacts: Display emergency contact information in visible areas, including local fire departments and our SERVPRO of Mid-City San Diego office.
SERVPRO of Mid-City San Diego Can HelpWhen disaster strikes, having a professional restoration team ready can make all the difference. SERVPRO of Mid-City San Diego specializes in fire damage restoration and can help you get back on your feet quickly. Don’t wait until it’s too late. Contact us today to learn how we can help protect your business from fire disasters.
Visit SERVPRO of Mid-City San Diego for more information.
How to Prepare Your Family and Home for Natural Disasters | SERVPRO of Mid-City San Diego
10/2/2024 (Permalink)
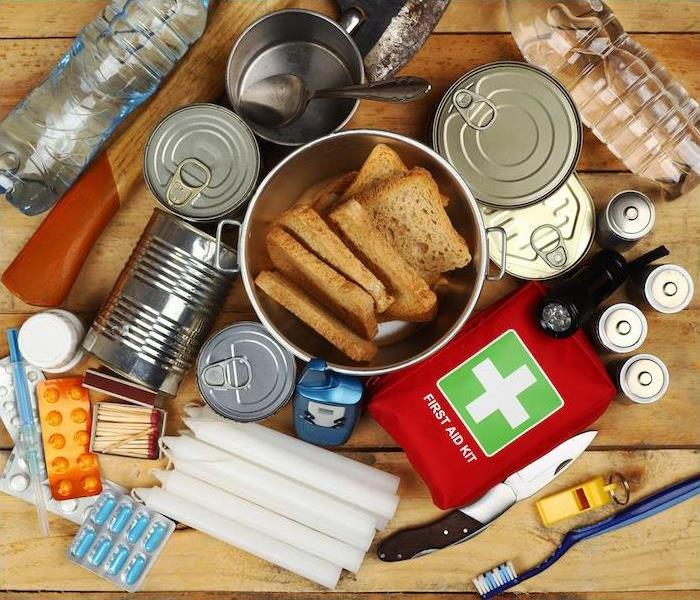 Use these helpful tips from SERVPRO of Mid-City San Diego to assemble an emergency kit to keep your family safe when disaster strikes.
Living in the San Diego area offers beautiful weather, but it’s important to remember that natural disasters can strike at any time. From wildfires to earthquakes, and even flooding, knowing how to prepare your home and family for potential dangers is essential to keeping everyone safe. Whether you’re a new homeowner or have been living in San Diego for years, disaster preparedness should always be a priority.
Common Natural DisastersSan Diego is vulnerable to several types of natural disasters:
- Wildfires: Due to dry conditions and strong Santa Ana winds, wildfires pose a significant threat, especially during the fall months.
- Earthquakes: Being in California, the San Andreas Fault and other smaller faults make San Diego susceptible to earthquakes.
- Flooding: Heavy rains during the winter months can lead to flash floods, especially in low-lying areas.
By preparing in advance for these potential disasters, you can minimize the impact on your home and keep your family safe.
Tips for Creating a Disaster Preparedness PlanHaving a clear, well-thought-out emergency preparedness plan is key. Here are some steps to help you get started:
1. Build an Emergency KitYour emergency kit should contain essential supplies to sustain your family for at least 72 hours. Items to include are:
- Non-perishable food and water
- Flashlights and extra batteries
- First aid kit and medications
- Important documents such as insurance papers, IDs, and financial information
- Cash, clothing, and blankets
2. Create an Evacuation PlanIt’s important to know the safest routes to evacuate your home. Practice your plan with your family to ensure everyone knows what to do in case of an emergency. Make sure to account for pets in your plan as well.
3. Protect Your HomeTo safeguard your home from natural disasters, you can:
- Install fire-resistant materials and clear any vegetation that could fuel a wildfire.
- Secure large items, such as bookshelves and appliances, to walls to minimize earthquake damage.
- Ensure proper drainage around your home to avoid flooding issues.
Stay InformedStay aware of local alerts and weather warnings. Knowing what’s coming can help you take action before disaster strikes. Be sure to sign up for local San Diego emergency notifications, and invest in a weather radio for updates during power outages.
For peace of mind, you can always count on SERVPRO of Mid-City San Diego to help you recover from the unexpected. We’re here to assist with disaster preparedness tips and provide restoration services when needed.
If you’re ready to take action and prepare your home for natural disasters, contact SERVPRO of Mid-City San Diego today for expert advice and assistance.
Visit us at SERVPRO of Mid-City San Diego to learn more!
How to Handle Storm Damage in San Diego, CA | SERVPRO of Mid-City San Diego
9/16/2024 (Permalink)
 Don't delay! When storm damages affects your property, call SERVPRO of Mid-City San Diego to restore your space.
San Diego may be known for its sunny weather, but it’s not immune to severe storms that can leave your home damaged. From winter rainstorms to occasional high winds, these weather events can cause significant issues for homeowners. Understanding the types of severe weather in San Diego and knowing what to do when your home is damaged can help you be prepared.
Types of Severe Weather in San Diego
While San Diego enjoys a mild climate, it does experience certain types of severe weather, particularly during the winter and spring months. The most common threats include:
- Heavy Rainstorms: Winter and early spring can bring heavy rain, leading to flooding, especially in low-lying areas. Flash floods can occur quickly, overwhelming drainage systems and causing water damage to homes.
- High Winds: Strong winds can accompany storms, leading to downed trees, power lines, and roof damage. These winds can cause debris to strike homes, breaking windows or damaging roofs.
- Coastal Flooding: Homes near the coast may also be at risk of coastal flooding, particularly during high tides combined with storm surges.
Steps to Take After Storm Damage
If your home has been damaged by a storm, taking immediate action is crucial to minimize further issues. Here’s what you should do:
Ensure Safety First: Before anything else, make sure you and your family are safe. If there’s significant damage or flooding, it may be unsafe to stay in your home. If necessary, find temporary shelter.
Document the Damage: Take photos and videos of the damage for insurance purposes. This documentation will be essential when filing a claim with your insurance company.
Contact SERVPRO of Mid-City San Diego: Professional restoration services are critical in dealing with storm damage. SERVPRO of Mid-City San Diego specializes in restoring homes after severe weather events. We have the expertise and equipment to handle everything from water extraction to structural repairs.
Prevent Further Damage: If it’s safe to do so, take steps to prevent further damage to your home. This might include tarping a damaged roof or boarding up broken windows.
Call Your Insurance Company: Report the damage to your insurance company as soon as possible. Provide them with the documentation you’ve gathered and follow their instructions for filing a claim.
Why Choose SERVPRO®?
When storms hit San Diego, you need a trusted partner to help you restore your home. SERVPRO of Mid-City San Diego has a proven track record of helping homeowners recover from storm damage. With their 24⁄7 emergency service, they are always ready to respond quickly, ensuring that your home is restored efficiently and professionally.
Don’t wait until the next storm hits. Visit SERVPRO of Mid-City San Diego today to learn more about their storm damage restoration services and how they can help protect your home.
The Best Fire Prevention Steps to Keep Your Home Safe | SERVPRO of Mid-City San Diego
9/6/2024 (Permalink)
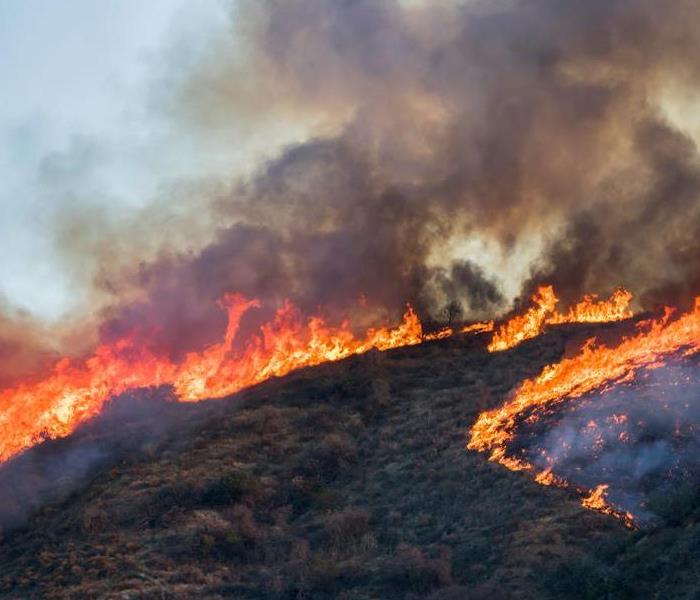 Brush and Tree Landscape Burning with Flame and Smoke During California Wildfire
As fall and winter approach in the San Diego area, it's crucial to be vigilant about fire safety in your home. The cooler months bring increased wildfire risks and a higher incidence of home fires, making it essential to take proactive steps to protect your property and loved ones.
Understanding Wildfire Risks in San Diego
San Diego's beautiful landscapes are also susceptible to wildfires, especially during the fall when dry conditions and Santa Ana winds create a perfect storm for fire outbreaks. According to recent statistics, California experienced over 7,000 wildfires in 2023, with many of them occurring in Southern California. While wildfires can be unpredictable, there are steps you can take to minimize the risk to your home.
- Create a Defensible Space
One of the most effective ways to protect your home from wildfires is by creating a defensible space. This means clearing at least 30 feet of space around your home, free of flammable materials like dry leaves, dead trees, and overgrown vegetation. By doing this, you can slow the spread of a wildfire and give firefighters a better chance of saving your property.
- Install Fire-Resistant Materials
Consider upgrading your home with fire-resistant materials, especially if you live in a wildfire-prone area like ours. Roofing, siding, and decking made from non-combustible materials can significantly reduce the risk of your home catching fire. SERVPRO of Mid-City San Diego recommends using Class A roofing materials, which are known for their excellent fire resistance.
Preventing Home Fires During the Cooler Months
While wildfires are a significant concern, home fires also spike during the fall and winter months. Heating equipment, candles, and holiday decorations can all be potential fire hazards. Here’s how you can minimize the risks:
- Regularly Maintain Heating Equipment
Ensure your heating equipment is in good working order before the colder months arrive. Faulty heaters and chimneys are leading causes of home fires during the winter. Schedule a professional inspection and cleaning to prevent any potential issues.
- Practice Safe Candle Use
Candles add a cozy ambiance to your home, but they can also be a fire hazard. Always place candles on stable surfaces, away from flammable objects, and never leave them unattended. Consider using battery-operated candles as a safer alternative.
- Be Cautious with Holiday Decorations
As the holiday season approaches, it's important to be mindful of fire hazards associated with decorations. Choose flame-resistant or flame-retardant decorations, and keep them away from heat sources like fireplaces and radiators.
By following these fire prevention tips, you can help protect your home and loved ones from the dangers of wildfires and home fires. SERVPRO of Mid-City San Diego is here to assist you with fire prevention and restoration services. Don't wait until it's too late—take action now to keep your home safe!
If you need expert restoration, visit our website at SERVPRO of Mid-City San Diego.
Essential Fire Prevention Tips for a Safe and Cozy Fall and Winter
8/30/2024 (Permalink)
As the crisp air of fall gives way to the chilly winter months, our homes become cozy sanctuaries where we seek warmth and comfort. However, the increased use of heating systems, fireplaces, and holiday decorations also brings a higher risk of house fires. To ensure your home stays safe during these colder months, it’s essential to follow some key fire prevention tips. This blog will provide practical advice to help you minimize the risk of fire and keep your loved ones safe throughout the fall and winter seasons.
Heating Safety
- Inspect Heating Systems: Have your heating system inspected and serviced by a professional before the start of the cold season. This includes furnaces, boilers, and chimneys.
- Space Heaters: Keep space heaters at least three feet away from flammable materials like curtains, bedding, and furniture. Always turn them off when leaving the room or going to bed.
- Fireplaces and Wood Stoves: Ensure that chimneys and flues are cleaned and inspected annually. Use a fireplace screen to prevent sparks from escaping, and only burn seasoned wood.
Electrical Safety
- Inspect Cords and Outlets: Check all electrical cords and outlets for damage or fraying. Replace any damaged cords immediately and avoid overloading outlets.
- Use Surge Protectors: Use surge protectors to prevent electrical fires caused by power surges, especially for high-wattage appliances and electronics.
- Holiday Decorations: When decorating for the holidays, use lights that are labeled for indoor or outdoor use accordingly. Inspect holiday lights for frayed wires or broken sockets, and turn off all lights before going to bed or leaving the house.
Kitchen Safety
- Never Leave Cooking Unattended: Stay in the kitchen while cooking, especially when using high heat or frying. If you need to leave the kitchen, turn off the stove.
- Keep Flammable Items Away: Keep flammable items like oven mitts, towels, and wooden utensils away from the stovetop.
- Use a Timer: Use a timer to remind you when food is cooking, and regularly check on the food.
Candle Safety
- Use Candles with Caution: Place candles on stable surfaces, away from flammable materials, and never leave them unattended. Consider using flameless candles as a safer alternative.
- Extinguish Before Sleeping: Always extinguish candles before leaving the room or going to sleep.
Smoke Alarms and Carbon Monoxide Detectors
- Install Smoke Alarms: Install smoke alarms on every level of your home, inside bedrooms, and outside sleeping areas. Test them monthly and replace the batteries at least once a year.
- Carbon Monoxide Detectors: Install carbon monoxide detectors in central locations and near sleeping areas. Test them regularly to ensure they are functioning properly.
Holiday Safety
- Christmas Trees: If using a real Christmas tree, keep it well-watered to prevent it from drying out and becoming a fire hazard. Place the tree away from heat sources and exits.
- Fireworks: Avoid using fireworks during holiday celebrations. Instead, attend public displays conducted by professionals.
Fire Escape Plan
- Develop a Plan: Create a fire escape plan that includes two ways out of every room and a designated meeting place outside. Ensure everyone in the household knows and practices the plan regularly.
- Practice Drills: Conduct fire drills at least twice a year to ensure everyone knows how to respond in case of an emergency.
Fire prevention is especially critical during the fall and winter months when the risk is higher due to increased heating, cooking, and holiday activities. By following these fire safety tips, you can significantly reduce the risk of a fire in your home and ensure a safe, warm, and joyous season for you and your family. Always stay vigilant and proactive in fire prevention to protect your home and loved ones from the devastating effects of fire. Give SERVPRO of Mid-City San Diego a call for your fire restoration services to help restore your home back to pre fire conditions.
What to Do if You Find Mold in Insulation?
7/17/2024 (Permalink)
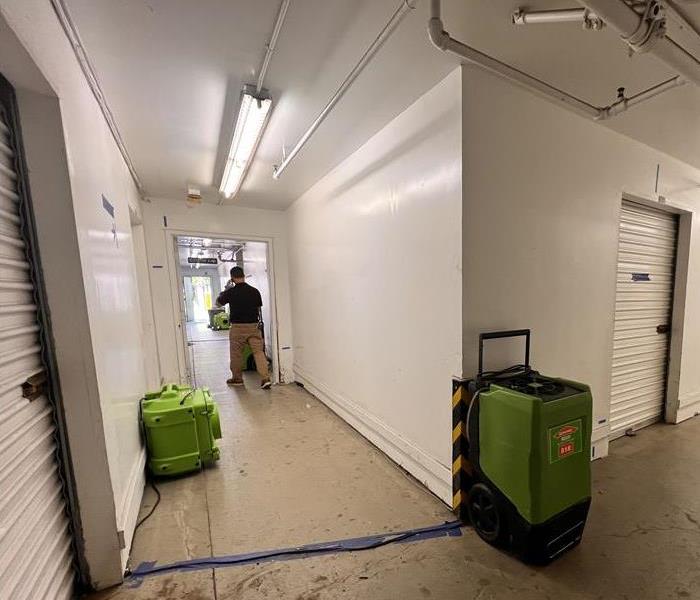 Addressing mold issues promptly and effectively is crucial to maintaining a safe and healthy living environment.
Discovering mold in your insulation can be alarming. Mold not only damages your property but also affects the air quality in your home. Addressing mold issues promptly and effectively is crucial to maintaining a safe and healthy living environment. In this blog, we'll guide you through the steps to take if you find mold in your insulation, including how to identify mold, remove it, and prevent future growth.
How to Identify Mold in Insulation
Mold can be tricky to spot, especially when it’s hidden in insulation. Here are some common signs that you might have mold in your insulation:
- Musty Odor
One of the first indicators of mold is a musty, unpleasant odor. If you notice a persistent smell in certain areas of your home, it could be a sign of mold in the insulation.
- Visible Mold Growth
Check your insulation for any visible signs of mold. Mold can appear as black, green, or white spots and can often be found in damp or poorly ventilated areas.
- Discoloration or Stains
Discoloration or stains on walls and ceilings near the insulation can indicate mold growth. If you notice unusual stains, it's worth investigating further to determine if mold is present.
Steps to Take If You Find Mold in Insulation
If you suspect or find mold in your insulation, it's important to take immediate action. Here are the steps to follow:
- Assess the Extent of the Mold
Determine how widespread the mold problem is. A small, localized area can often be handled by homeowners, but larger infestations may require professional assistance.
- Wear Protective Gear
When dealing with mold, always wear protective gear, including gloves, a mask, and goggles. This helps prevent exposure to mold spores.
- Isolate the Area
Seal off the affected area to prevent mold spores from spreading to other parts of your home. Use plastic sheeting and tape to cover doorways and vents.
- Remove Contaminated Insulation
Carefully remove the moldy insulation and place it in heavy-duty plastic bags. Seal the bags tightly and dispose of them according to local regulations. Be sure to handle the insulation gently to avoid releasing mold spores into the air.
- Clean the Surrounding Area
After removing the contaminated insulation, clean the surrounding area thoroughly. Use a mold removal solution or a mixture of water and detergent to scrub all surfaces. Be sure to dry the area completely to prevent mold from returning.
- Replace the Insulation
Once the area is clean and dry, replace the old insulation with new, mold-resistant insulation. This can help prevent future mold growth and improve your home's overall insulation.
- Fix the Moisture Problem
Mold thrives in moist environments, so it's essential to address any underlying moisture issues. Check for leaks, improve ventilation, and consider using a dehumidifier to keep humidity levels in check.
Finding mold in your insulation can be a daunting experience, but with the right steps, you can effectively address and prevent it. By identifying the signs of mold, safely removing contaminated insulation, and taking preventive measures, you can maintain a healthy and safe living environment. If you encounter a significant mold problem, don’t hesitate to contact a professional mold remediation service like SERVPRO of Mid-City San Diego for expert assistance. Keeping your home mold-free ensures better air quality and protects your property from damage.
The Role of Insurance in Water Damage Restoration
6/12/2024 (Permalink)
 Your insurance coverage plays a major role in water damage restoration, and our team can help you out with it!
Water damage can occur unexpectedly, posing a threat to your property and belongings. In such situations, having the right insurance coverage can make a significant difference in the restoration process. Understanding the role of insurance in water damage restoration is crucial for homeowners and business owners alike. In this blog, we will explore the importance of insurance in water damage restoration and how it can help mitigate the financial impact of such incidents.
Types of Insurance Coverage
Different types of insurance policies provide coverage for water damage. The primary ones include:
- Homeowners Insurance: Most standard homeowners insurance policies cover water damage caused by sudden and accidental incidents, such as burst pipes or appliance malfunctions.
- Flood Insurance: Flood damage is typically not covered by standard homeowners insurance. Residents in flood-prone areas are encouraged to obtain separate flood insurance policies to protect their properties from damage caused by rising waters.
- Commercial Property Insurance: Business owners can protect their properties from water damage through commercial property insurance, which typically covers water damage caused by burst pipes, roof leaks, or other covered perils.
Assessing Coverage
Understanding the specifics of your insurance coverage is essential. When faced with water damage, it is crucial to assess your policy to determine the extent of coverage for the damage. It is advisable to be aware of any limitations or exclusions that may affect your coverage for water damage incidents.
Filing an Insurance Claim
In the event of water damage, filing an insurance claim promptly is vital. When filing a claim, it is important to provide detailed documentation of the damage, including photographs and a thorough inventory of the affected items. Additionally, engaging the services of a professional water damage restoration company can help facilitate the claims process, as they can provide comprehensive documentation and estimates for the restoration work.
Working with Restoration Professionals
Reputable water damage restoration companies often have experience working with insurance companies. They can assist in the claims process by providing accurate assessments, cost estimates, and supporting documentation. Working with professionals can help streamline the restoration process and ensure that the necessary repairs and remediation work are conducted promptly and effectively.
Maximizing Insurance Benefits
Making informed decisions when it comes to insurance claims can help maximize your benefits. It is advisable to keep records of all communication with the insurance company, including claim forms, estimates, and receipts for any expenses related to the restoration process. Maintaining thorough documentation can help ensure that you receive fair compensation for the restoration of your property.
In conclusion, insurance plays a crucial role in water damage restoration by providing financial protection and assistance in the event of unforeseen incidents. Understanding your insurance coverage, filing claims promptly, and working with professional restoration experts can help mitigate the impact of water damage and expedite the restoration process. If you require assistance with water damage restoration, contact SERVPRO® for reliable and professional restoration services.
Common Types of Storm Damage and How to Prevent Them
5/15/2024 (Permalink)
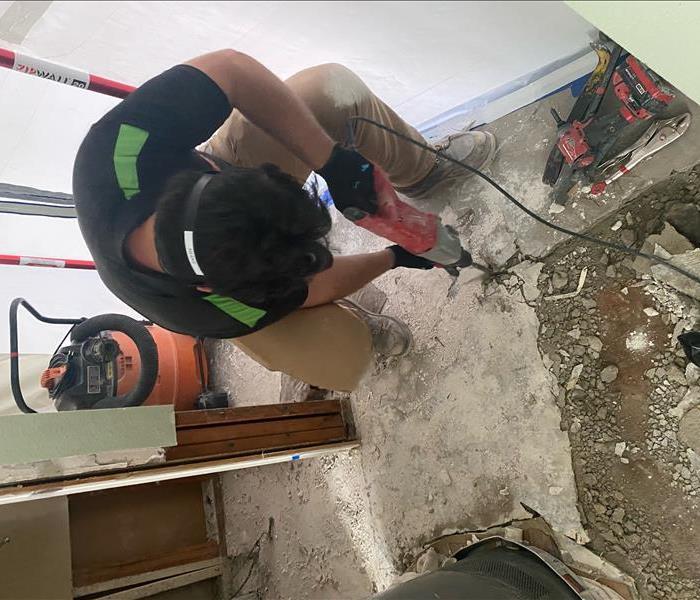 In this blog, we will explore the most common types of storm damage in San Diego and provide valuable tips on how to prevent them.
Living in San Diego, the beautiful Southern California city known for its mild climate and pleasant weather can sometimes be disrupted by severe storms. These storms can bring strong winds, heavy rains, and even hail, resulting in significant damage to homes and properties. In this blog, we will explore the most common types of storm damage in San Diego and provide valuable tips on how to prevent them, ensuring the safety and well-being of your property.
Structural Wind Damage
Strong winds during storms can cause structural damage to homes, compromising their integrity. To prevent severe structural wind damage, consider the following measures:
- Reinforce Roofing: Ensure that your roof is secure by checking for loose or damaged shingles, as well as providing proper insulation and reinforcement.
- Secure Doors and Windows: Install storm shutters or impact-resistant windows and doors to protect against wind pressure and flying debris.
- Trim Trees and Branches: Regularly trim trees near your property to prevent falling branches or trees during storms. Consult with an arborist or tree service professional for proper tree maintenance.
Flooding and Water Damage
Heavy rains associated with storms can lead to flooding and water damage inside your home. Take these preventative steps to minimize the risk:
- Maintain Gutters and Downspouts: Clean your gutters regularly to ensure proper water flow and direct water away from the foundation. Install downspout extensions to divert water further from the house.
- Improve Drainage: Ensure that the grading around your property slopes away from the foundation to prevent water from pooling near the building.
- Waterproof Basements and Crawl Spaces: Apply waterproof coatings or sealants to basement walls and floors. Install a sump pump in basements or crawl spaces prone to flooding.
Hail Damage
Although not as common in San Diego, hailstorms can cause significant damage to your home. Take the following preventive measures:
- Inspect and Maintain Roofing: Regularly inspect your roof for loose, damaged, or missing shingles. Consider impact-resistant roofing materials or hail guards for added protection.
- Protect Vehicles: If possible, park vehicles in garages or under-covered areas during hailstorm warnings. If no covered options are available, use car covers or find temporary shelter during the storm.
Power Outages
Storms can cause power outages, leaving your home vulnerable and uncomfortable. Consider these steps to mitigate the impact of power loss:
- Install Backup Power Systems: Invest in a backup power generator to ensure your home has a reliable source of electricity during outages. Consult with a professional to determine the appropriate generator for your needs.
- Prepare Emergency Kits: Assemble emergency kits that include flashlights, batteries, non-perishable food, and drinking water. These kits will help ensure your comfort and safety during power outages.
- Surge Protection: Install surge protectors to safeguard sensitive electronics and appliances against power surges caused by storms.
Implementing these preventative measures can minimize the risk of severe home damage from storms in San Diego. However, in the event of storm damage, it is crucial to contact professionals like SERVPRO® to assess and restore any structural wind damage, water damage, or hail damage promptly.
In Conclusion
San Diego's mild climate does not exempt it from the occasional severe storm. Understanding the most common types of storm damage and taking preventative measures can help protect your property and keep occupants safe. From reinforcing the structure against strong winds to mitigating flooding risk and preparing for power outages, taking proactive steps is the key to preventing severe home damage. Remember, in the event of storm damage, SERVPRO is always ready to assist with professional assessment and restoration to restore your property efficiently and effectively.
The Different Stages of Fire Damage Restoration
4/17/2024 (Permalink)
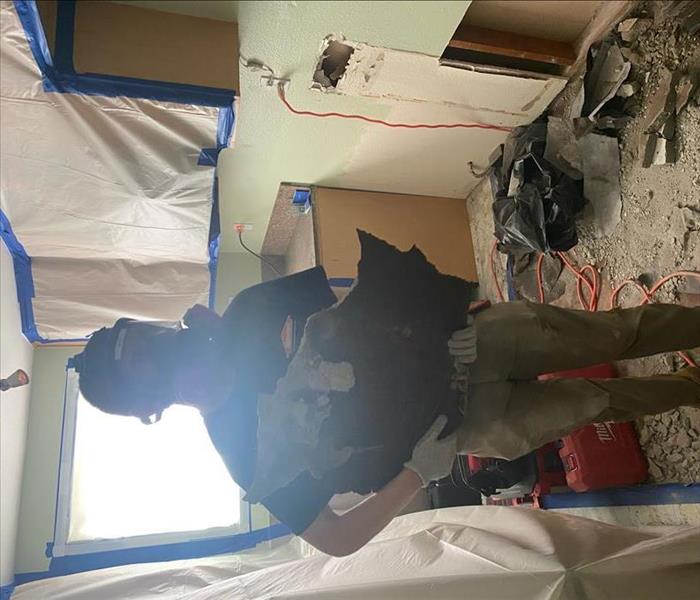 In this blog, we will explore the key stages involved in fire damage remediation and restoration.
When a fire strikes, the aftermath can be overwhelming. Fire damage not only affects the structure of a building but also personal belongings. Fortunately, professional fire damage restoration services, like those offered by SERVPRO®, can help restore your property to its pre-fire condition. Understanding the different stages of fire damage restoration is essential to ensure a successful and comprehensive restoration process. In this blog, we will explore the key stages involved in fire damage remediation and restoration. By familiarizing yourself with these stages, you can better prepare for the restoration process and get your life back on track.
Emergency Response and Inspection
The first stage of fire damage restoration is the emergency response and inspection. As soon as it is safe to do so, contact a professional fire restoration company, such as SERVPRO, for immediate assistance. They will dispatch a team of certified technicians to assess the extent of the fire damage and create an action plan tailored to your specific needs.
During the inspection, professionals will assess structural damage, examine affected areas, and identify the extent of smoke damage to personal belongings. This crucial step allows them to develop an efficient and effective restoration plan.
Water Removal and Drying
Water damage often accompanies fire damage due to firefighting efforts. The next stage involves water removal and drying to prevent secondary damage, such as mold growth. Certified technicians will utilize specialized equipment to extract standing water, dehumidify the area, and initiate the drying process.
Prompt action is crucial during this stage, as it helps minimize further damage and prepares the space for the next steps in the restoration process.
Smoke and Soot Cleanup
Fire damage leaves behind smoke and soot that can permeate every surface of a building, including personal belongings. Smoke and soot cleanup is an integral part of fire damage restoration. Professionals will employ advanced techniques and equipment to remove smoke residues, clean affected surfaces, and eliminate lingering odors.
This stage involves specialized cleaning methods suitable for specific materials and items. Professionals will meticulously clean and restore personal belongings, including furniture, clothing, upholstery, and electronics.
Structural Repair and Reconstruction
Once the cleanup is complete, the focus shifts to structural repair and reconstruction. This stage involves repairing damaged walls, ceilings, floors, and other structural components. SERVPRO professionals are experienced in handling the restoration of fire-damaged structures, ensuring that repairs are made to safeguard the structural integrity of the building.
Content Restoration and Cleaning
During a fire, personal belongings can suffer smoke damage and require cleaning and restoration. SERVPRO offers comprehensive content restoration services, including document and electronics restoration, art and antique restoration, and delicate item cleaning. This stage ensures that your valuable belongings are restored whenever possible.
Final Inspection and Completion
The final stage of fire damage restoration involves a thorough inspection to ensure everything has been restored to its pre-fire condition. Professionals will review the restoration work, addressing any remaining concerns or touch-ups. Once the final inspection is complete, you can confidently move back into your home or resume business operations.
Fire damage restoration is a complex and multifaceted process that requires professional expertise. Understanding the different stages – emergency response, water removal and drying, smoke and soot cleanup, structural repair, content restoration, and final inspection – helps homeowners and businesses prepare for the restoration journey. Through the expertise of certified technicians at SERVPRO, fire-damaged structures can be restored, personal belongings can be cleaned and restored, and life can gradually return to normal. Trusting the restoration process to professionals ensures a comprehensive and successful fire damage restoration experience.
Mold in Your Basement: Causes and Remediation Strategies
3/13/2024 (Permalink)
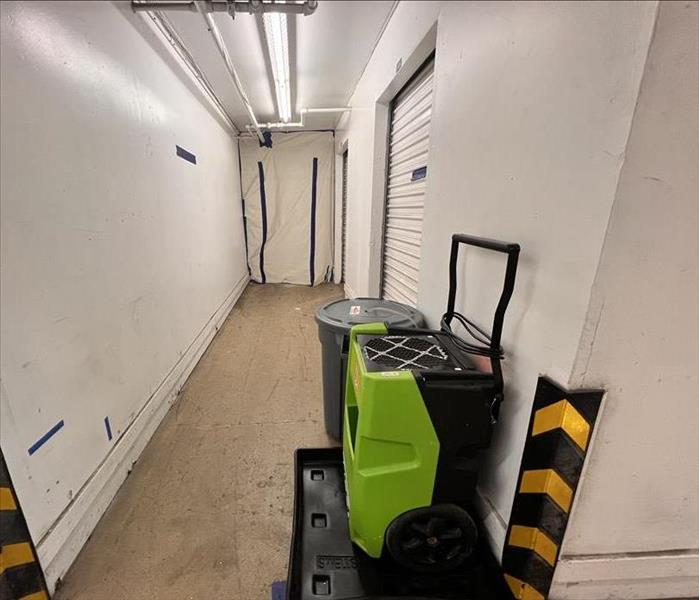 In this blog, we will explore why mold may occur in basements and provide tips on how to remediate mold effectively.
Discovering mold in your basement can be a concerning issue. While mold growth poses potential risks to your property, it is important to understand the causes and effective remediation strategies for addressing mold in your basement. In this blog, we will explore why mold may occur in basements and provide tips on how to remediate mold effectively.
Causes of Mold in Basements
Basements are prone to mold growth due to several contributing factors. Understanding these causes can help in preventing mold in the first place. Here are some common causes of mold in basements:
- Moisture Intrusion: Excessive moisture in the form of water leaks or seepage is one of the primary culprits behind mold growth in basements. Leaky pipes, foundation cracks, or floods can introduce moisture into the basement, creating an ideal environment for mold to thrive.
- Poor Ventilation: Inadequate air circulation and ventilation in basements trap moisture, increasing the humidity levels. Higher humidity provides the necessary conditions for mold growth.
- Dampness and Condensation: Basements tend to be cooler than the rest of the house, making them more prone to condensation. When warm air comes into contact with cooler surfaces, such as walls or pipes, condensation can occur, creating a moist environment suitable for mold growth.
Remediation Strategies
If you discover mold in your basement, prompt action is crucial to prevent further damage. Here are some effective remediation strategies to tackle the issue:
- Identify and Fix the Source of Moisture: Start by locating and addressing any sources of moisture intrusion in your basement. Repair pipe leaks, seal foundation cracks, and address any other issues causing moisture to enter your basement. This step is vital to prevent recurring mold growth.
- Improve Ventilation: Enhance the airflow in your basement by using fans or opening windows. Consider installing an exhaust fan or a dehumidifier specifically designed for basements to help reduce humidity levels.
- Remove Mold-Infested Materials: If there are porous materials like carpets, drywall, or insulation that have been extensively affected by mold, it may be necessary to remove and replace them to eliminate mold completely.
- Clean and Disinfect: For mold growth on solid surfaces, use a solution of one part white vinegar to three parts water or a commercial mold cleaner recommended for use in basements. Scrub the affected areas thoroughly, ensuring all visible mold growth is removed.
- Dry Thoroughly: After cleaning, make sure to dry the basement entirely to prevent future mold growth. Use fans, dehumidifiers, and open windows to promote airflow and remove any lingering moisture.
- Consult Professionals: If the mold growth is extensive or if you are unsure about the proper remediation process, consult professionals like SERVPRO® who specialize in mold restoration services. They have the expertise, equipment, and techniques to handle severe cases of mold in basements, ensuring effective remediation.
Understanding the causes and implementing appropriate remediation strategies are vital steps in addressing mold in your basement. By identifying and rectifying the sources of moisture intrusion, improving ventilation, and taking prompt action to remove mold growth, you can restore your basement and prevent further damage. Remember, prevention is key, so regularly inspect your basement for any signs of moisture or mold and address issues promptly to maintain a healthy and mold-free environment.
Under the Weather: Tackling Roof Leaks and Water Damage
2/11/2024 (Permalink)
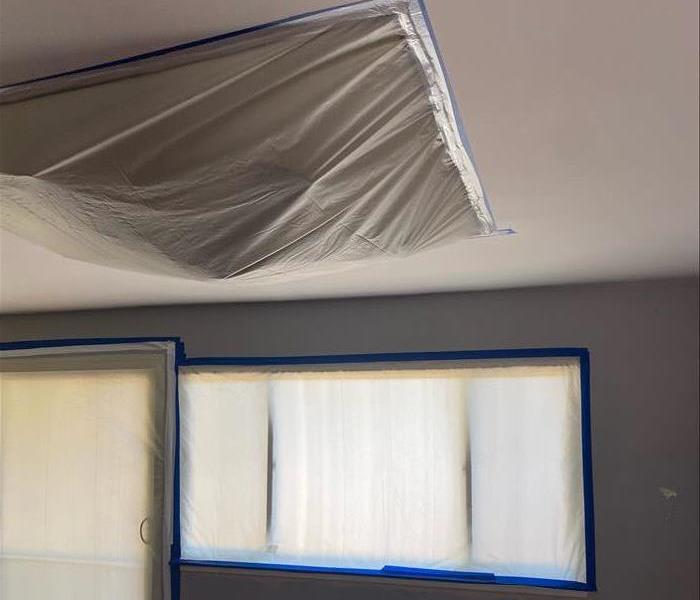 A leaky roof is more than a minor inconvenience; it's a gateway for potential water damage.
A leaky roof is more than a minor inconvenience; it's a gateway for potential water damage. Detecting and addressing roof leaks promptly is crucial for preventing extensive damage and costly repairs. In this blog, we explore the importance of regular roof inspections, the common causes of roof leaks, and effective repair strategies to keep your home dry and secure.
The Significance of Roof Inspections
Regular roof inspections are the first line of defense against water damage. They allow homeowners to identify potential issues early, preventing minor leaks from escalating into major problems. Schedule inspections at least twice a year, ideally in the spring and fall, and after severe weather events.
Common Causes of Roof Leaks
Understanding the common culprits behind roof leaks empowers homeowners to address issues promptly. Some prevalent causes include:
- Damaged or Missing Shingles
- Aging Roofing Materials
- Flashing Issues
- Clogged Gutters
Early Detection
Identifying roof leaks in their early stages is crucial. Look for signs such as water stains on ceilings, discolored walls, or peeling paint. During inspections, pay attention to the condition of the roof, checking for loose or damaged shingles, deteriorated flashing, and any other visible issues.
DIY Repairs vs. Professional Assistance
While some homeowners may attempt DIY roof repairs, it's crucial to assess the complexity of the issue. Simple tasks like replacing a few missing shingles may be manageable, but more intricate problems, such as flashing issues or widespread damage, often require professional expertise. Roofing professionals can conduct thorough assessments and provide long-lasting solutions.
Flashing Repairs
Damaged flashing can compromise the integrity of your roof. Professional roofers can assess the condition of flashing and make necessary repairs or replacements to ensure a watertight seal around vulnerable areas. Clogged gutters and downspouts are also a common cause of roof leaks. Regularly clean out debris, ensuring unobstructed water flow.
In cases of sudden roof damage, such as severe storms or fallen branches, it's crucial to address emergency repairs quickly. Tarping or covering damaged areas can provide temporary protection until more extensive repairs can be conducted.
With regular inspections and timely repairs, homeowners can protect their homes against these threats. By staying vigilant, promptly addressing issues, and seeking professional assistance when needed, you ensure that your roof remains a strong protector, keeping your home dry and secure for years to come.
Understanding the Impact of Wind Damage & the Steps to Restoration
1/14/2024 (Permalink)
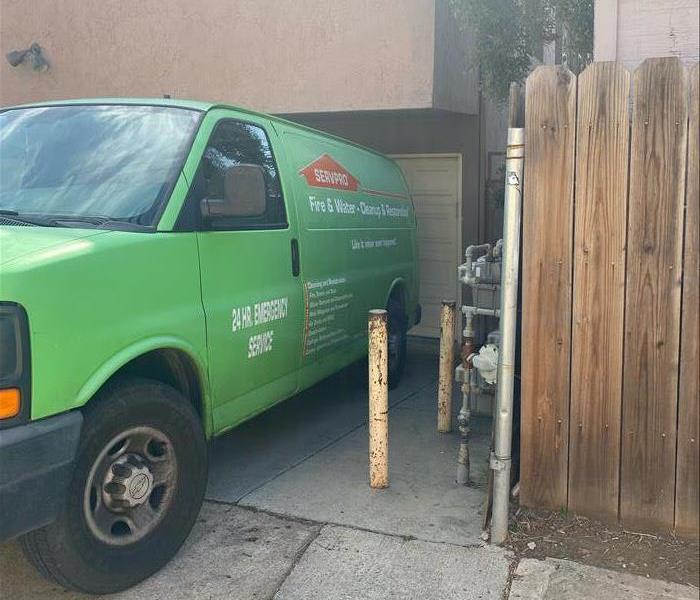 Whether it's from a severe storm, tornado, or hurricane, the aftermath of wind damage can be distressing and overwhelming.
Wind damage can wreak havoc on homes and businesses. Whether it's from a severe storm, tornado, or hurricane, the aftermath of wind damage can be distressing and overwhelming. Understanding the implications of wind damage and knowing how to navigate the restoration process is crucial for swift recovery.
The Impact of Wind Damage
1. Roof Damage
Strong winds can uplift or dislodge shingles, cause roof leaks, or even lead to structural compromises. Timely inspection and repair are essential to prevent further water intrusion or structural issues.
2. Structural Compromise
Wind can weaken the structural integrity of buildings, causing damage to walls, windows, and doors. This may compromise the safety and security of the property.
3. Debris and Impact
Flying debris during high winds can cause severe damage to property exteriors, including siding, fences, and landscaping. Impact damage may necessitate repairs or replacements.
Steps to Address Wind Damage
1. Safety First
Prioritize safety. Assess the property for any immediate dangers and avoid entering areas that could pose risks due to structural instability.
2. Documentation
Document the damage by taking photographs or videos. This documentation will assist in insurance claims and help professionals understand the extent of the damage.
3. Temporary Repairs
Take immediate action to prevent further damage. Cover broken windows, tarp tarp-damaged roofs, and secure any exposed areas to mitigate additional harm.
4. Professional Assessment
Contact certified restoration professionals like SERVPRO of Mid-City San Diego to conduct a thorough assessment of the damage. Their expertise is vital in understanding the full scope of the restoration needed.
The Restoration Process
1. Inspection and Assessment
Trained technicians will perform a detailed inspection to identify all areas of damage and develop a comprehensive restoration plan.
2. Water Extraction and Drying
If water intrusion has occurred due to wind damage, professionals will extract standing water and implement drying techniques to prevent further issues like mold growth.
3. Structural Repairs
Repairing damaged structures, roofs, walls, windows, and doors is a priority. This ensures the property's safety and prevents further deterioration.
4. Cleanup and Restoration
Professionals will thoroughly clean debris, restore damaged areas, and return the property to its pre-damage condition.
Importance of Professional Assistance
Seeking professional help for wind damage restoration is crucial. Trained experts possess the skills, equipment, and experience necessary to efficiently restore your property. Their swift response can mitigate further damage and expedite the recovery process.
Wind damage can be a distressing ordeal, but with the right approach and professional assistance, recovery is possible. Prompt action, thorough assessment, and skilled restoration are crucial in mitigating wind damage's aftermath.
At SERVPRO of Mid-City San Diego, our dedicated team is committed to providing efficient wind damage restoration services, helping you restore safety, security, and peace of mind to your property. Contact us for expert assistance in navigating the restoration process and recovering swiftly from wind damage.
Cooking Safely: How to Prevent Kitchen Fires and What to Do If One Occurs
12/20/2023 (Permalink)
 Despite your best efforts, kitchen fires can still happen.
The kitchen is the heart of your home, where delicious meals are prepared, and cherished memories are made. However, it's also a place where fires can happen if safety precautions are overlooked. In this blog, we'll provide valuable tips on preventing kitchen fires and outline the steps to take in case one occurs. By following these guidelines, you can protect your family, property, and peace of mind.
Prevention is Key
Preventing kitchen fires starts with being proactive and vigilant. Here are some essential steps you can take to reduce the risk of fires in your kitchen:
Never Leave Cooking Unattended
The most common cause of kitchen fires is unattended cooking. Stay in the kitchen when you're frying, grilling, or broiling, and use a timer to remind you of the cooking process.
Keep Flammable Items Away
Keep dish towels, oven mitts, and paper towels away from the stovetop. Loose clothing should be tucked in to prevent accidental contact with burners.
Regularly Clean Your Appliances
Grease and food particles can accumulate on stovetops and in ovens, creating a fire hazard. Clean your appliances regularly to avoid this.
Check for Faulty Wiring
Faulty wiring in kitchen appliances can lead to electrical fires. Regularly inspect your appliances for damaged cords or outlets.
Install a Smoke Alarm
Ensure your kitchen is equipped with a working smoke alarm. Test it regularly, and replace the batteries as needed.
What to Do in Case of a Kitchen Fire
Despite your best efforts, kitchen fires can still happen. Knowing how to react quickly and effectively can make all the difference. Here's a step-by-step guide on what to do if a kitchen fire occurs:
- Stay Calm
The most critical step is to remain calm. Panic can hinder your ability to respond effectively.
- Turn Off the Heat
If a fire starts in a pot or pan, turn off the heat source immediately.
- Use a Lid or Fire Extinguisher
If the fire is small and contained, you can try to smother it by covering the pot or pan with a lid. Alternatively, use a fire extinguisher designed for kitchen fires. Always have a fire extinguisher nearby and know how to use it.
- Never Use Water
Never use water to extinguish a grease fire, as it can cause the flames to spread. It's crucial to remember this.
- Evacuate Safely
If the fire is not quickly extinguished or grows out of control, evacuate the kitchen and close the door behind you. Call 911 immediately.
- Stay Low
If the kitchen is filled with smoke, stay low to the ground, where the air is less smoky.
Preventing kitchen fires and knowing how to respond if one occurs is essential for the safety of your family and your home. By following these guidelines and staying vigilant in the kitchen, you can greatly reduce the risk of fires. Remember to have a working smoke alarm, fire extinguisher, and a well-thought-out evacuation plan. Cooking can be enjoyable and safe when you take the right precautions. Your kitchen should always be a place of warmth and comfort, not a source of danger!
A Complete Guide to the Mold Damage Restoration Process
11/16/2023 (Permalink)
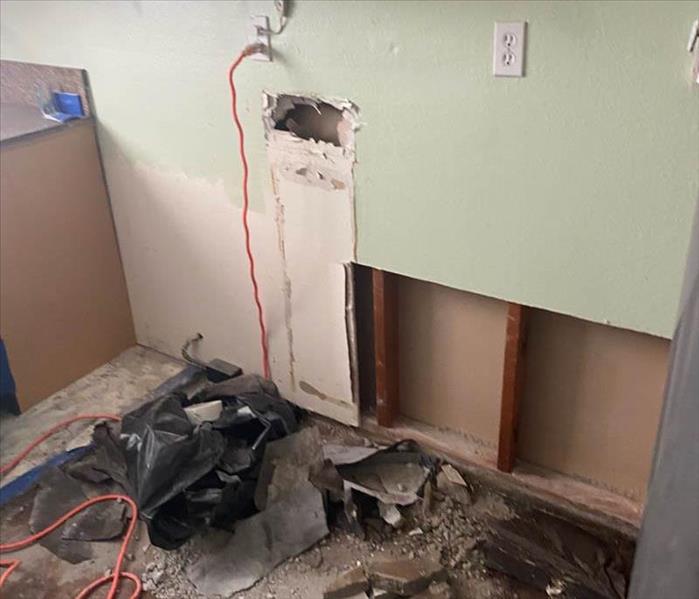 Mold damage can be a homeowner's worst nightmare
Mold damage can be a homeowner's worst nightmare. Understanding the mold damage restoration process is essential to effectively address this issue and restore your home to a safe and comfortable living space. In this blog, we provide a comprehensive guide to the steps involved in the mold damage restoration process.
1. Initial Assessment
The first step in the mold damage restoration process is a thorough assessment of the affected area. This involves identifying the type of mold, the extent of the infestation, and the underlying causes, such as leaks or high humidity. A precise assessment is essential for developing a targeted restoration plan.
2. Isolation and Containment
To prevent the spread of mold spores, containment measures are implemented. Plastic sheeting and negative air pressure systems are used to isolate the affected area and prevent cross-contamination.
3. Mold Removal
The next critical step is the safe and thorough removal of mold from affected surfaces. Moldy materials may need to be discarded, and specialized cleaning techniques are employed to eliminate mold and its spores.
4. Air Filtration
High-efficiency particulate air (HEPA) filtration systems are used to capture airborne mold spores and particles, further preventing the spread of mold during the removal process.
5. Cleaning and Sanitizing
All surfaces and materials in the affected area are meticulously cleaned and sanitized to eliminate any remaining traces of mold and prevent its return.
6. Drying and Dehumidification
Addressing the underlying moisture issue is crucial to prevent future mold growth. Dehumidifiers and air movers are used to ensure the affected area is thoroughly dried.
7. Repairs and Restoration
If structural materials or surfaces were damaged during the mold infestation, repairs and restoration are carried out to return your home to its pre-damage condition.
8. Final Inspection
A final inspection is conducted to verify that all mold has been removed, and the property is safe for occupancy. Any necessary adjustments or additional repairs are made at this stage.
9. Preventative Measures
To ensure mold doesn't return, it's essential to address the root causes of the infestation, such as fixing leaks, improving ventilation, and reducing humidity levels.
10. Documentation
Throughout the restoration process, detailed documentation is maintained, including photographs, moisture readings, and records of all work performed. This documentation is crucial for insurance claims and future peace of mind.
Understanding the mold damage restoration process is the first step to a successful recovery. When dealing with mold, it's essential to work with a professional restoration team like SERVPRO® of Mid-City San Diego. We have the experience, expertise, and resources to efficiently restore your property and ensure it remains mold-free. If you're facing mold damage, don't hesitate to reach out for immediate assistance!
How To Improve Your Indoor Air Quality After Water Damage
10/10/2023 (Permalink)
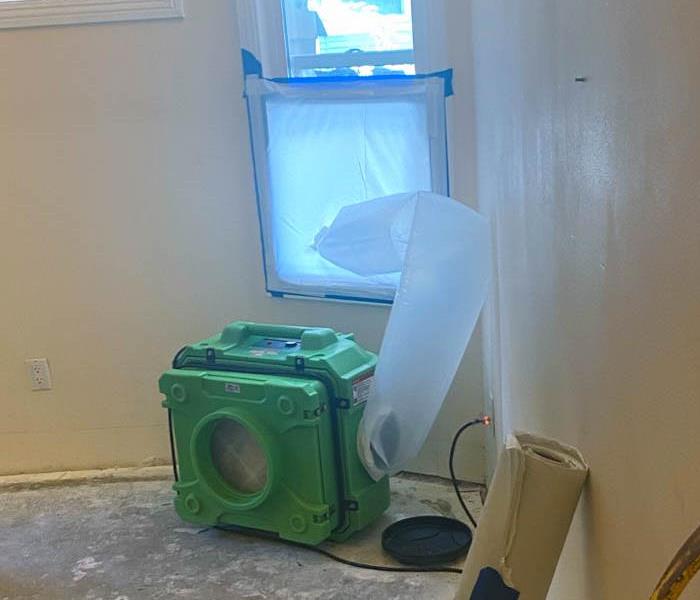 Restoring indoor air quality after water damage is crucial for your well-being.
Water damage can be a distressing experience for homeowners in San Diego, but it's not just the visible damage that's a concern. Water intrusion can also compromise your indoor air quality. In this blog, we'll explore the steps you can take to restore indoor air quality after water damage in your San Diego home.
Understanding the Impact on Indoor Air Quality
Water damage can introduce a variety of pollutants into your home's indoor air, including:
Mold Spores: Moisture creates the ideal conditions for mold growth, and mold spores can easily become airborne and spread.
Bacteria and Pathogens: Contaminated water can carry harmful bacteria and pathogens, posing risks.
Dust Mites: Increased humidity levels can promote dust mite populations.
Steps to Restore Indoor Air Quality After Water Damage
Ensure Safety
Before tackling air quality restoration, ensure your safety by turning off electrical power if necessary and wearing appropriate protective gear.
Remove Standing Water
The first step is to remove standing water and moisture. Use pumps, fans, and dehumidifiers to expedite the drying process.
Address Mold and Mildew
Mold and mildew can thrive in damp conditions. Inspect your home for visible signs of mold and mildew and address them promptly through professional remediation.
Ventilation
Increase ventilation by opening windows and doors, and using fans to circulate air. Good airflow helps remove pollutants from your indoor environment.
Dehumidification
Maintain indoor humidity levels below 50% to discourage mold, bacteria, and dust mites. Use dehumidifiers if necessary.
Clean and Disinfect
Clean and disinfect surfaces thoroughly to remove contaminants. Use appropriate cleaning agents to ensure effective disinfection.
Air Purification
Consider using air purifiers with HEPA filters to trap airborne particles, including mold spores and bacteria. Ensure your HVAC system has a clean filter.
Professional Assistance
In severe cases of water damage, it's wise to seek professional assistance. SERVPRO® of Mid-City San Diego specializes in water damage restoration and indoor air quality improvement.
Restoring indoor air quality after water damage is crucial for your well-being. While you can take several steps on your own, for the most effective and thorough restoration, consider enlisting the expertise of professionals like SERVPRO® of Mid-City San Diego. Our team has the knowledge, experience, and equipment to address water damage and its impact on indoor air quality, ensuring your home is safe and comfortable once again. Remember, prioritizing indoor air quality is a significant step in the recovery process after water damage.
Essential Roofing Maintenance and Repairs for Storm Resilience in San Diego
9/17/2023 (Permalink)
Welcome to SERVPRO of San Diego's blog! We're here to provide you with expert insights to help you fortify your property against the challenges of nature. In this blog, we'll delve into crucial tips and strategies for enhancing your roof's resilience to storms in the beautiful city of San Diego. A strong roof is your best defense against the elements, so let's dive in!
1. Regular Roof Inspections: Your First Line of Defense
Regular roof inspections are the cornerstone of storm resilience. Schedule professional inspections at least twice a year, preferably in spring and fall. Look out for:
Shingle Condition: Replace any cracked, curled, or missing shingles to prevent leaks and water damage.
Flashing Integrity: Ensure that flashing around chimneys, vents, and skylights is tightly sealed to prevent water infiltration.
Gutter Maintenance: Clean gutters and downspouts to prevent water buildup that can lead to roof damage.
2. Reinforce Roof Structure: Strengthening for Severe Weather
Invest in reinforcements to help your roof withstand San Diego's occasional severe weather:
Roof Bracing: If your area is prone to strong winds, consider professional roof bracing to enhance structural integrity.
Hurricane Straps: Install hurricane straps to securely anchor your roof to the walls, minimizing the risk of detachment.
3. Seal Vulnerabilities: Waterproofing is Key
To enhance storm resilience, proper waterproofing is essential:
Seal Cracks and Gaps: Regularly inspect your roof for cracks and gaps, sealing them with appropriate materials to prevent water intrusion.
Waterproof Membranes: Consider applying waterproof membranes to vulnerable areas like flat roofs to prevent leaks.
4. Trim Trees and Overhanging Branches: Preventing Impact Damage
San Diego's storms can bring down branches and debris. Trim trees around your property to avoid:
Impact Damage: Falling branches can puncture your roof during a storm, leading to significant damage and leaks.
Clogged Gutters: Prevent debris from accumulating on your roof and in your gutters, reducing the risk of water pooling.
5. Emergency Repairs: Be Prepared
No matter how well-prepared you are, emergencies can still occur. Know how to perform basic emergency repairs:
Temporary Patching: Learn how to temporarily patch a leak to minimize damage until professional help arrives.
Secure Loose Items: Secure loose shingles or roofing components that might detach during a storm and cause further damage.
6. Professional Help: Storm Damage Restoration Experts
In the aftermath of a severe storm, it's crucial to seek professional assistance:
Swift Response: Contact storm damage restoration experts like SERVPRO of San Diego to assess and address any storm-related issues promptly.
Thorough Inspection: Professionals can identify hidden damage that might not be immediately apparent to homeowners.
Incorporating these tips into your roofing maintenance routine will help fortify your home against San Diego's weather. A resilient roof is an investment in the long-term protection of your property and the safety of your family.
For comprehensive storm damage restoration and expert roofing repairs in San Diego, trust the skilled professionals at SERVPRO. Contact us today to ensure your home is ready to face whatever nature throws its way.
How to Put Out a Grease Fire: A Guide to Swift and Safe Actions
8/2/2023 (Permalink)
A grease fire can be a terrifying and dangerous situation, but knowing how to respond quickly and effectively can help prevent the fire from escalating. In this blog, we'll provide you with essential steps to put out a grease fire and protect yourself and your surroundings from harm.
Stay Calm and Act Fast
The first and most important rule when dealing with a grease fire is to remain calm. Panic can lead to hasty decisions and potentially worsen the situation. Act swiftly but thoughtfully to minimize the risk. Immediately turn off the heat source, whether it's a stovetop burner or an oven. This will help prevent the fire from growing larger and spreading further.
Use a metal lid or baking sheet to cover the flames. Without access to oxygen, the fire should smother and die down. Avoid using glass lids or plastic covers, as they can melt or break under high heat.
Smother the Fire with Baking Soda or Salt
If covering the flames isn't possible or doesn't work, use baking soda or salt to smother the fire. Sprinkle a generous amount directly onto the flames, aiming for the base. These substances can help extinguish the fire by depriving it of oxygen.
If the fire is not under control or is spreading rapidly, use a class B fire extinguisher to safely put out the flames. Aim at the base of the fire and sweep the extinguisher from side to side until the flames are extinguished. Ensure that you are using the correct type of fire extinguisher for grease fires.
Water should never be used to extinguish a grease fire, as it can cause the flames to spread and create an explosion-like reaction. Similarly, flour is also not recommended, as it can ignite and make the fire worse.
Call for Emergency Assistance
If the flames are not quickly and effectively extinguished, it is crucial to call emergency services right away. Ensure you provide accurate information about the situation and follow any specific instructions they give.
If the fire becomes unmanageable, grows beyond control, or you are unable to put it out, prioritize your safety and evacuate the area. Alert others in the vicinity and follow the designated evacuation procedures.
Knowing how to put out a grease fire is crucial for preventing injuries and minimizing property damage. By staying calm, quickly turning off the heat source, covering the flames, using baking soda or a fire extinguisher, and calling for emergency assistance when needed, you can effectively combat a grease fire and keep yourself and those around you safe. Remember, safety should always be your top priority, and if a situation becomes unmanageable, it's better to evacuate and seek professional help.
Signs of a Shower Leak: How to Detect and Address the Problem
7/13/2023 (Permalink)
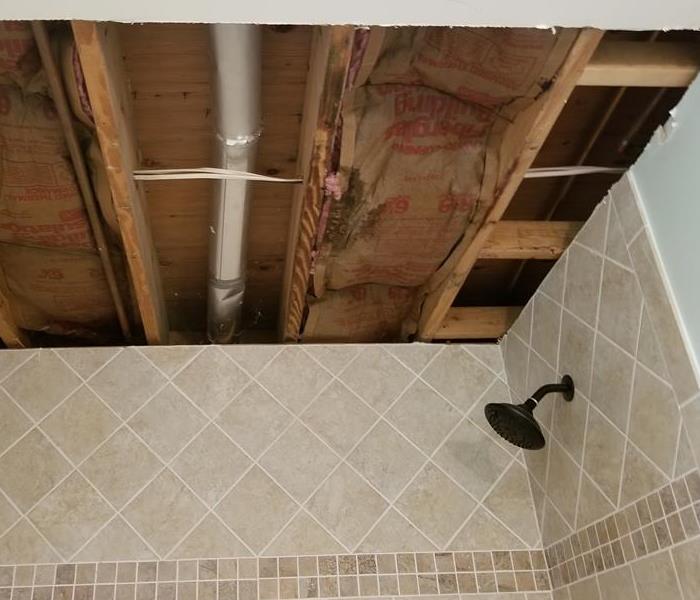 Detecting a shower leak early can prevent water damage to your home or business.
A shower leak can cause extensive damage if left undetected and untreated. It not only leads to water wastage but can also result in structural issues, mold growth, and increased utility bills. Identifying a shower leak early on is crucial to prevent further damage and the need for costly repairs. In this blog post, we will discuss common signs that indicate a shower leak, helping you take prompt action and resolve the issue before it escalates.
Damp or Discolored Walls and Floors
One of the primary signs of a shower leak is the presence of dampness or discoloration on the walls and floors surrounding the shower area. If you notice water stains, peeling paint, or bubbling wallpaper, it is likely an indication of water infiltration from a leak.
Excessive moisture from a shower leak creates an ideal environment for mold and mildew growth. If you notice mold or mildew developing on the walls, ceiling, or grout lines in your bathroom, it could be a sign of a hidden shower leak. Pay attention to musty odors as well, as they often accompany mold growth.
Loose or Damaged Tiles
Water seeping through a shower leak can cause tiles to become loose or damaged. If you notice any tiles that are cracked, loose, or coming off the wall, it may be a result of water damage caused by a leak. Inspect the grout lines as well, as deteriorated or missing grout can indicate water penetration.
Spongy or Soft Walls
When water infiltrates the walls due to a shower leak, it can cause the paint to peel, bubble, or become discolored. Keep an eye out for these signs, especially near the shower area or on adjacent walls.
If you press against the walls surrounding the shower and they feel spongy, soft, or give in under pressure, it indicates moisture damage caused by a leak. Moisture weakens the structure of the wall, causing it to lose its rigidity.
Increased Water Bill
A sudden spike in your water bill without any significant changes in water usage patterns can be an indication of a hidden shower leak. Monitor your water bill closely and investigate further if you notice an unexplained increase.
Visible water pooling or puddles on the bathroom floor, even after you have used the shower, suggests a leak. Ensure that there are no other sources of water causing the pooling, such as a dripping faucet or an overflow issue.
Water Stains on the Ceiling or Lower Levels
If your shower is located on an upper floor, water from a shower leak can travel downwards and cause stains on the ceiling or walls of lower levels. Check for water stains or discoloration on the ceiling below the shower area.
What to Do If You Suspect a Shower Leak:
- Inspect the shower area carefully for any visible signs of leaks or damage.
- Check the caulking and grout around the shower, ensuring they are in good condition.
- Test the showerhead, faucets, and valves for any signs of dripping or leakage.
- Consider hiring a professional plumber or contractor specializing in water leak detection to perform a thorough inspection if you are unable to identify the source of the leak.
- Promptly address any identified issues by repairing or replacing damaged components, such as caulking, grout, or shower fixtures.
Detecting a shower leak early on is crucial to prevent further damage and avoid costly repairs. By paying attention to signs such as dampness, discoloration, mold growth, loose tiles, peeling paint, soft walls, increased water bills, water pooling, or stains on lower levels, you can identify a shower leak and take prompt action. It is important to address the issue promptly by repairing or replacing damaged components to mitigate any potential damage and ensure the integrity of your bathroom. Remember, if you're uncertain about the source or extent of the leak, it's best to consult a professional to accurately diagnose and resolve the problem.
Essential Tips for Maintaining a Commercial Roof
6/17/2023 (Permalink)
The roof is one of the most critical components of any commercial building. It provides protection against the elements and plays a crucial role in maintaining the structural integrity of the property. To maximize the lifespan and performance of your commercial roof, regular upkeep is essential. In this blog post, we will discuss key tips and strategies for maintaining a commercial roof, ensuring its longevity, and avoiding costly repairs.
Regular Inspections
Perform routine inspections of your commercial roof to identify potential issues early on. Look for signs of damage, such as cracks, punctures, loose or missing materials, and signs of wear and tear. Inspect flashings, seams, drains, and gutters for any signs of damage or blockages. Regular inspections allow you to address minor problems before they escalate into more significant issues.
Clear Debris and Keep Gutters Clean
Remove debris, leaves, and other materials from the roof surface regularly. Debris accumulation can clog drains and gutters, leading to water backup and potential roof leaks. Ensure that gutters and downspouts are clear of debris to facilitate proper water drainage. Regular cleaning will prevent unnecessary strain on the roof and help maintain its integrity.
Address Roof Leaks Immediately
If you notice any signs of roof leaks, such as water stains on ceilings or walls, mold growth, or dampness, address them promptly. Roof leaks can cause significant damage to the building's interior and compromise the structural integrity of the roof. Identify the source of the leak, repair it, and assess any necessary repairs to the affected areas.
Maintain Proper Drainage
Ensure that the roof's drainage system is functioning correctly. Improper drainage can lead to water pooling, which can cause structural damage and roof deterioration over time. Regularly inspect drains, gutters, and downspouts for blockages or clogs, and address them promptly. Consider installing additional drainage systems if needed to redirect water away from the roof.
Conduct Professional Roof Inspections
In addition to regular inspections, it is advisable to schedule professional roof inspections periodically. Roofing professionals can provide a comprehensive assessment of the roof's condition, identify potential issues, and recommend necessary repairs or maintenance. Professional inspections are especially crucial after severe weather events or as part of a preventive maintenance plan.
Perform Regular Roof Maintenance
Follow a proactive maintenance plan for your commercial roof. This may include tasks such as cleaning, resealing roof penetrations, repairing damaged flashings, and maintaining rooftop equipment. Stay updated on manufacturer guidelines and recommended maintenance practices specific to your roof type and material.
Address Vegetation and Pest Control
Keep an eye out for vegetation growth on the roof, such as moss or algae. These organisms can retain moisture and accelerate roof deterioration. Take necessary measures to remove or prevent vegetation growth. Additionally, address any pest infestations promptly, as pests can cause damage to the roof membrane or create entry points for water.
Proper upkeep of a commercial roof is crucial for its longevity and performance. By following these essential tips, including regular inspections, clearing debris, addressing leaks, maintaining proper drainage, scheduling professional inspections, performing regular maintenance, and addressing vegetation and pest control, you can protect your investment and avoid costly repairs. Remember that a well-maintained roof ensures the safety, functionality, and longevity of your commercial property.
How to Safely and Effectively Remove Mold from HVACs and Ducts: A Step-by-Step Guide
5/8/2023 (Permalink)
Mold growth in HVAC (heating, ventilation, and air conditioning) systems and ducts can be a serious health hazard, as it can spread mold spores throughout your home or building. If you suspect that there is mold in your HVAC system or ducts, it's important to take action as soon as possible to prevent it from spreading. In this blog, we'll discuss how to remove mold from HVACs/ducts.
Turn off the HVAC system
The first step in removing mold from HVACs/ducts is to turn off the system to prevent the mold spores from spreading. This may involve turning off the power to the system and shutting off the air supply.
Assess the extent of the mold growth
The next step is to assess the extent of the mold growth in the HVAC system and ducts. This may involve inspecting the system and ducts visually or using specialized equipment to test the air quality and moisture levels. This may require a professional with expertise in the HVAC industry.
Contain the mold
Once the extent of the mold growth has been determined, the next step is to contain the mold to prevent it from spreading. This may involve sealing off the affected area with plastic sheeting and using negative air pressure to prevent mold spores from escaping. Call a professional immediately to prevent secondary damages.
Remove the mold
The next step is to physically remove the mold from the HVAC system and ducts. This may involve using specialized cleaning solutions and equipment to remove the mold from the ducts, coils, and other components of the system.
Clean and disinfect
After the mold has been removed, the HVAC system and ducts will need to be thoroughly cleaned and disinfected to prevent the mold from returning. This may involve using specialized cleaning solutions and techniques, such as HEPA vacuuming, to remove any remaining mold spores.
Repair and maintenance
Finally, any damage to the HVAC system and ducts will need to be repaired, and steps will need to be taken to prevent mold from returning. This may involve repairing leaks and improving ventilation and air flow in the system.
In conclusion, removing mold from HVACs/ducts can be a complex and time-consuming process, but it's important to address the issue to protect your health and prevent further damage. By working with a professional mold remediation service, you can ensure that the mold is properly removed from your HVAC system and ducts, and steps are taken to prevent it from returning.
Clean and Safe: A Step-by-Step Guide to Removing Dryer Lint from the Exhaust
4/12/2023 (Permalink)
A clothes dryer is an essential appliance in most households, but it can pose a fire hazard if not maintained properly. One of the main maintenance tasks for a dryer is removing lint from the exhaust. Lint buildup can obstruct the exhaust, causing the dryer to overheat and potentially start a fire. In this blog post, we will discuss how to remove dryer lint from the exhaust safely and effectively.
Unplug the dryer
Before starting any maintenance work on the dryer, make sure to unplug it from the electrical outlet. This will ensure that there is no risk of electric shock while working on the appliance.
Locate the exhaust vent
The exhaust vent is typically located on the back of the dryer or on the side. It is usually a thin, flexible metal tube that runs from the dryer to the outside of the house.
Disconnect the exhaust vent from the dryer
To remove lint from the exhaust, you will need to disconnect the vent from the dryer. Depending on the type of dryer you have, this may involve unscrewing clamps or simply pulling the vent off the back of the dryer.
Clean the exhaust vent
Once you have disconnected the exhaust vent from the dryer, take it outside and use a vacuum cleaner or a brush to remove any lint buildup. You can also use a dryer vent cleaning kit, which typically includes a brush and a flexible rod, to clean the vent thoroughly. Run the brush through the vent from both ends until you remove as much lint as possible.
Clean the dryer duct
While the exhaust vent is disconnected, you should also clean the dryer duct that runs from the back of the dryer to the exhaust vent. This can be done using the same methods as cleaning the exhaust vent. Make sure to remove as much lint as possible, as even a small amount of buildup can pose a fire hazard.
Reconnect the exhaust vent
After you have cleaned the exhaust vent and dryer duct, it is time to reconnect the vent to the dryer. Make sure to secure it properly to prevent any leaks or disconnections.
Plug in the dryer
Finally, plug the dryer back into the electrical outlet and test it to make sure it is running smoothly. Regular maintenance of your dryer's exhaust vent is essential to prevent fire hazards and ensure the efficient operation of the appliance.
In conclusion, removing lint from the dryer exhaust is a crucial maintenance task that should not be neglected. By following the steps outlined in this blog post, you can safely and effectively remove lint from your dryer's exhaust and reduce the risk of fire. Remember to perform this task regularly to keep your dryer running smoothly and safely for years to come.
How do you keep pipes from freezing?
3/8/2023 (Permalink)
There's nothing worse than taking a shower and then realizing that there's no hot water. Or worse, you may find yourself trying to take a shower in freezing cold conditions and discovering that the water from your faucet has turned into ice. While this isn't an everyday occurrence for most people, it does happen occasionally. In this article, we'll talk about how to keep your pipes from freezing so that your home stays warm during those cold winter months.
Insulate pipes and keep the heat turned up.
The best way to keep pipes from freezing is to insulate them and keep the heat turned up. Make sure you have enough insulation around your pipes, which means wrapping them in foam or fiberglass wool. You should also make sure that any air leaks are sealed up before winter hits so that heat doesn't escape through these cracks.
When it comes to keeping your home warm enough for your plumbing system, that means keeping an eye on things like drafts coming in from windows or doors; if you can feel cool air blowing against parts of your house, then it's time for some weatherstripping or caulking. If possible, try not leaving any gaps between window frames where cold air could get into the house. This will help prevent freezing temperatures from affecting those exposed pipes under the house.
Adequate insulation on the pipes in the crawl space.
If you have a crawlspace, make sure there's adequate insulation on the pipes in that space. If not, add some! Insulation should be at least 6 inches thick and cover all sides of the pipes.
exterior pipe insulation
If you have an exterior pipe, cover it with insulation. The best way to do this is with foam insulation. You'll want to make sure the foam isn't too thick or else it won't be able to keep the water flowing through your pipes warm enough. If this is an option for you, consider using a heat tape along with your new layer of protection so that no matter how cold outside gets (or how much snow piles up), there will be no need for concern about frozen pipes.
No Small Openings
To keep your pipes from freezing, you should make sure that there are no small openings for air to get in around your pipes, especially if you have underground pipes and pipes in unheated spaces like crawlspaces or attics.
You can insulate the entire length of any exposed pipe with insulation that's made for outdoor use. If possible, insulate the crawlspace under your house so that heat doesn't escape through those areas. This will help keep both hot water tanks and furnaces warm enough to avoid freezing temperatures inside them as well!
Don't Turn the Water On
If you have frozen pipes, don't turn on any water until SERVPRO has arrived. Turning on the faucet can cause a pipe to burst or crack and begin leaking immediately. If this happens, shut off the water and call us right away so that we can fix it before more damage occurs
Frozen pipes can be very dangerous to your home so take care to protect your home when it's cold out. If you have any questions about how to keep your pipes from freezing or if you have any other plumbing issues, contact SERVPRO today. We are here 24/7 and ready to help!
What Are the 3 Categories of Water Damage?
12/5/2022 (Permalink)
What Are the Three Types of Water Damage?
Water damage can be serious, especially if it is not dealt with quickly. It is important to know the difference between the three categories of water damage so that you can get the right help. Classifying the kind of water damage that has occurred is important because it helps you determine what you should do next. The more information you have, the better equipped you are to make an informed decision about what to do with your property.
Category 1 Water – “Clean Water”
Category 1 Water is water that has been used for drinking, washing or other household purposes. This type of water is not harmful to your health or the environment and does not require any cleanup.
Category 1 water includes:
- Water from the kitchen sink faucet when you are washing dishes
- Water from your bathtub after showering
- Water from a toilet flushed without any waste matter in it
Category 2 Water – “Gray Water”
This type of water is mainly comprised of toilet waste, but it's not as dangerous as black water because it contains less harmful bacteria. However, gray water can still contain harmful bacteria, viruses, and parasites.
Category 3 Water – “Black Water”
Category 3 water is the worst kind of water damage. It’s usually caused by sewage or flood waters. If you see any signs of black water, get out of your house immediately and call us! We can help you identify what needs to be done to fix your home so that it will be safe again after dealing with this type of disaster.
Call SERVPRO of Mid-City San Diego
If you have a water damage emergency, call us as soon as possible. We are available 24/7, and we will be happy to send one of our highly trained technicians out to your home or business in San Diego, CA to provide a free estimate. With over 1,700 Franchises in the United States and Canada, we can be there quickly in times of need, no matter the time or day.
We offer complete services for any type of water damage—from leaks in the kitchen or bathroom to flooding from heavy rain and storms—and our technicians are ready with the right equipment to do the job.
Water damage can be devastating to your home or business. The first step to getting your property back to normal is to properly classify the type of water damage that has occurred. If you have just had water damage, it is important to know how to classify it so that you can get the right help. If you find yourself in this situation, call us at SERVPRO of Mid-City San Diego and we will help you out.
How Do I Install a New Toilet?
11/1/2022 (Permalink)
What Is the Best Way to Install a New Toilet?
Replacing a toilet at home in San Diego is fairly simple. Before you do this, however, make sure that you have all the parts on hand for installation—and double-check that you're using the correct parts! Once your new toilet is in place, you'll need to run some water through it to flush out any debris from manufacturing or shipping (which could affect how well everything flushes). Here is how you install a new toilet.
Install the new wax ring
Use a wax ring kit, which includes a wax ring and the necessary bolts to install it. Put the wax ring on the flange, making sure that it is centered and sitting flat against the bottom of your toilet bowl. You can use a small amount of plumber’s putty if needed to help keep it in place as you set your toilet bowl onto it later on in this process of installing a new toilet (this is also known as “setting”).
Slide your new toilet into place over top of your old one and gently lower it down until all four legs are resting firmly on top of their corresponding base bolts or screws—you should hear three distinct clicks when they hit home!
Tighten the bolts
Once the bolts are in place, you can tighten them using a wrench or pliers. If you’re using a torque wrench (which is highly recommended), be sure to use it to tighten the bolts.
If there were any minor leaks around the base of your toilet before installation, this should have fixed those problems and stopped them from happening again.
You may notice that there are two types of bolts: one type has a flat edge while the other has an indented edge on one side and an indented groove on its opposite side. These different bolt types ensure that your toilet will drain properly into either hooked-up drains or into P-traps with vents attached to them respectively.
Connect the water supply line
Attach the water supply line to the toilet. Tighten the nut on the bottom of your water supply line, making sure it's not kinked or pinched. Then, look for any leaks that may indicate a problem with your toilet installation.
Test Your Work
After you've completed the installation and tested your work, it's time to verify that everything is working properly. Check for leaks first by placing a bowl under the toilet base. If there are any drips, tighten any loose nuts on the underside of the tank or connect some leak-stopping putty if needed.
Next, flush your toilet and make sure that it performs as expected every time. It should fill completely with water before draining completely as well as drain completely in less than four seconds. If these steps don't seem right to you or if there are any other issues with performance, call a plumber immediately!
Replacing a toilet at home is simple
For the most part, replacing a toilet is a very simple process. However, before you start loosening bolts and unscrewing nuts, it's important to make sure not to over tighten them. Over tightening can cause cracks in the porcelain and lead to leaks over time.
To avoid this problem, use either a wrench or pliers to tighten your bolts after everything else has been put together. Once the seat is installed and all other parts are in place, re-tighten all of them so they're snug but not too tight.
Replacing a toilet is not a difficult project and can be accomplished by anyone with a few simple tools. This guide is designed to help make the process as easy as possible by walking you through each step of the way. By following these instructions and being mindful of what you are doing, you will be able to install a new toilet in no time at all!
How do You Estimate a Fire Damage?
10/1/2022 (Permalink)
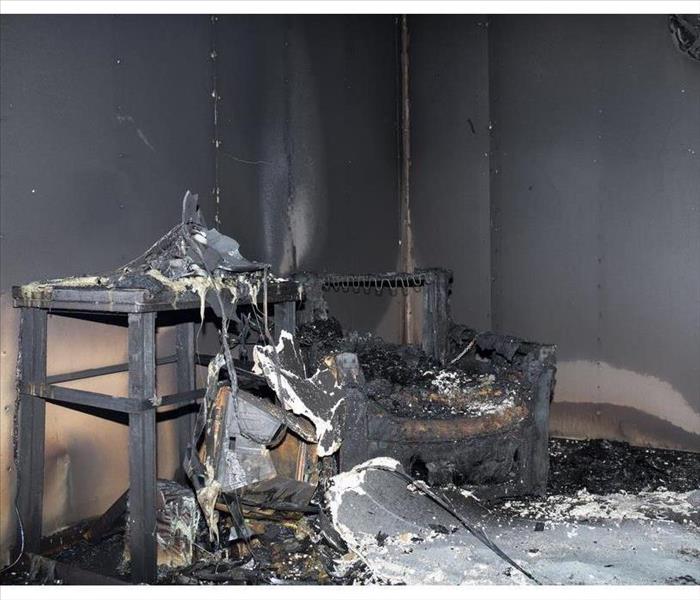 Fire damage to a home in San Diego, CA.
What You Should Know Before and After a Fire Loss
Fire damage is a devastating event that can have major consequences to your home and life. Fortunately, it's also usually something you can recover from. The more you know about fire damage, the more prepared you'll be during this time of need. Here's what you need to know:
What is fire damage?
Fire damage is caused by heat. This can be caused by electrical fires, gas leaks, explosions (like when a stove or furnace explodes), or cooking accidents (like when you spill hot grease on your carpet). It can also be caused intentionally with arson or cigarettes/cigars.
What can be done to prevent or minimize fire damage?
Preventing or minimizing damage is the best way to reduce cost, but it's not always possible. If you do find yourself in a situation where fire damage is imminent and cannot be avoided, there are some things that can be done to protect your property:
- Use a fire extinguisher if you're able to reach one safely.
- Close doors and windows to keep smoke out of rooms where people are trapped or sleeping.
- Stay out of harm's way until emergency responders arrive on scene or until all occupants have made their way outside the building safely.
- Call 911 immediately when smoke starts pouring into your home from an unknown source (or even from within). This will alert firefighters to get there as quickly as possible so they can begin working on containing and extinguishing the fire.
What will the fire inspector look for?
When a fire inspector arrives on-scene of your loss in San Diego, CA, he or she will ask what kind of fire it was. This is to determine whether the fire was accidental or intentional. After determining the type of fire, the inspector will begin an inspection to see if there is any damage that was caused by heat, smoke and/or water from firefighters' efforts to extinguish the blaze.
If there are no structural concerns after inspecting both interior and exterior areas of your property—meaning that everything looks safe enough for people be present on your property—then it's time for cleanup!
How long does it take to restore fire damage?
The time it takes to restore fire damage depends on the severity of the fire and whether there are any additional damages that need to be addressed. If your home was destroyed by a raging inferno, you may be looking at months before you can return home. However, if only some of your furniture and belongings have been damaged, then you could expect restoration work to be completed within a few days.
Fire damage is a serious matter. It can be dangerous for the property owner, as well as their neighbors and family members. In addition to being dangerous, it can also be very expensive. If you find yourself in need of repairs after a fire or other type of emergency, it’s important that you understand how this process works so that everything runs smoothly.
Exploring the Benefits of Smart Smoke Detectors
8/30/2022 (Permalink)
Advantages of Smart Smoke Detectors
Worrying about house fires in Azalea, CA, is something that all homeowners concern themselves with. The risk of property damage or injury is significant enough that laws insist dwellings install working smoke detectors. Smoke can be just as dangerous as fire, sucking the oxygen from the room and facilitating a scary and potentially deadly environment. Smart smoke detectors can do all that standard smoke alarms can and more.
What Is a Smart Smoke Alarm?
Smart smoke alarms detect smoke inside your home. If smoke is detected, the alarm rings at a volume high enough to make people aware that the issue is occurring. If the smoke dissipates, the alarm will stop. Besides these similarities to traditional smoke alarms, smart smoke alarms have other capabilities. They can do the following:
Connect to the home's Wi-Fi network to communicate with other devices
Send messages to smartphones
Be disabled remotely using smartphones
Detect carbon monoxide
Employ voice alerts rather than a siren
Help pinpoint the location of the disturbance
Where Should You Place Smart Smoke Alarms?
Traditionally, a smoke detector is placed near where people sleep. The same is true for a smart smoke alarm. Placement in hallways outside of bedrooms is a popular spot because the sound will travel immediately to adjacent rooms.
Kitchens are also important spots to install alarms because fire safety specialists insist that fires can start anywhere, especially when ovens and ranges are in play. Additionally, there should be at least one device on every floor of a home.
When a smoke alarm goes off, immediate action needs to be taken. Smart smoke alarms help you to quickly get your bearings when this unusual scenario unfolds and can be the difference between you putting out a small kitchen fire or calling in a professional restoration service to clean up damage caused by a large one.
5 Ways the Right Restoration Company Eases the Claim Process
8/27/2022 (Permalink)
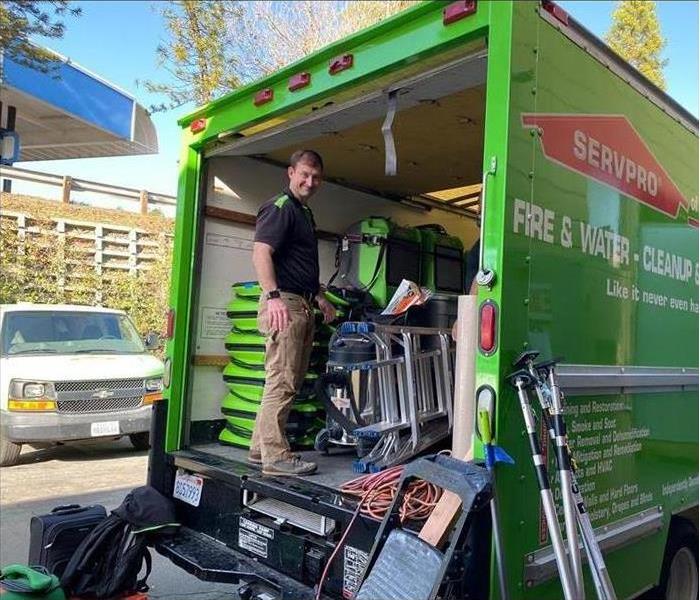 24/7 Storm Response
Five Reasons SERVPRO Hits the Mark
After a severe storm hits Chollas Lake, CA, there is a good chance that insurance adjusters will have a massive workload. Knowing how important quality yet quick storm restoration is to the business affected, choosing the right storm damage restoration company is essential to ensuring an easy and fast claims process that results in restoring a property to preloss condition. Below are five reasons SERVPRO hits the mark.
1. 24/7 Storm Response: No matter what time of day or day of the week, you can count on your call being answered 24/7. Once the claim call is answered, there are more than 1,900 local franchises ready to take action and get the process rolling.
2. Corporate Network: Every franchise is backed by a corporate network. That means support at all levels, from assisting the technicians to helping answer questions regarding claims or other items.
3. Certified Local Technicians: As a nationwide brand, every franchisee must adhere to strict training standards. Every technician is required to complete ongoing training to maintain IICRC certification. That training is also focused on restoring versus replacing.
4. Electronics Claims: After the initial assessment, every detail of the damage and needed cleanup and restoration repairs will be available in electronic form. This keeps the data secure and accessible across devices for all parties involved.
5. Full-service Restoration: Instead of trying to deal with numerous contractors, you get a one-stop-shop for all a business’s flood damage needs. From the get-go, the restoration team will complete any board-up services, remove damaged items, extract water, dry out the property, clean affected areas and complete all restoration needs.
When storm restoration is needed, time is always of the essence. Instead of getting bogged down by the claim process, it is worth choosing a restoration company that provides all the services need and trained to ensure a smooth claim.
3 Reasons To Hire Professional Flood Cleanup
8/22/2022 (Permalink)
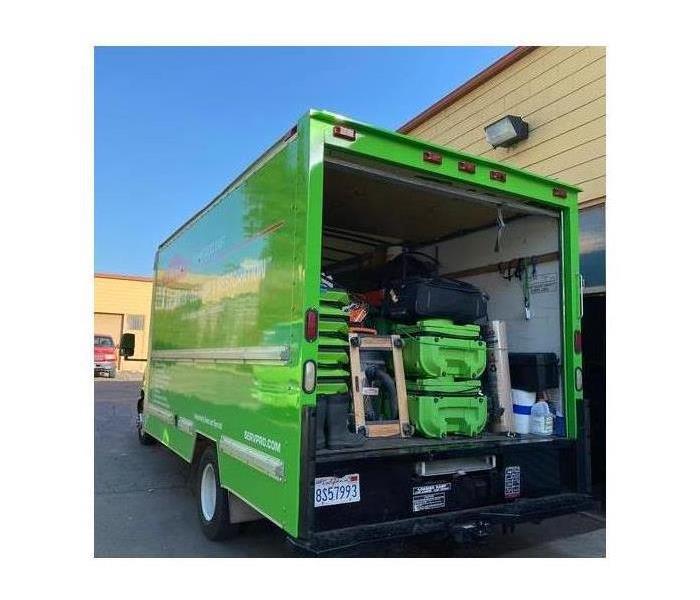 SERVPRO is ready to mobilize for any disaster, from fires to floods and anything in between!
Reasons To Hire Expert Flood Cleanup
A heavy storm near your home in Rolando Village, CA, can cause a lot of water damage. Water can leak in from damaged areas of your roof, through broken windows or even from an overtaxed sewer. If your home needs repairs, it is better to call flood mitigation professionals than try to clean up the mess yourself. Here are three of the many reasons why experts are necessary.
1. Thorough Assessment
Certified professionals have the training and experience needed to determine the repairs your home needs. Without reliable testing, you may end up with a mold problem that festers in the damaged areas your own inspection misses. Technicians can root out the cause of the problem so that it can get completely resolved.
2. Proper Disinfection
Flood water is considered black water, or Category 3 water. Category 3 water is contaminated with bacteria, viruses and other microscopic organisms that you don’t want living on the surfaces in your home. Storm remediation isn’t just a matter of cleaning up water damage. Experts can also disinfect all the affected areas so that your home is free of any germs brought in by the storm.
3. Claim Information
Hiring professional mitigators can give you the information you need to file a successful insurance claim. The specialists can provide an itemized list of repairs you need and how much each repair costs. This list can be especially helpful if your insurance adjuster is delayed by the volume of claims in the area. Having documentation means you don’t have to wait on the adjuster to arrive to start the restoration process.
If a storm causes water damage to your home, one of your first calls should be to a local restoration company. Professional technicians can help you by identifying the whole problem, making sure cleanup includes disinfection and providing vital information for your insurance company. You may find that such services are well worth the cost.
What To Do With Electronics After a Fire
7/31/2022 (Permalink)
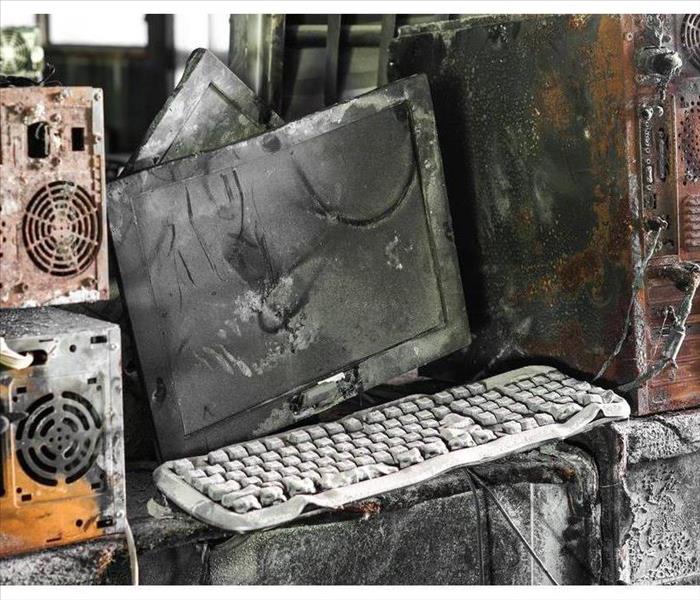 Electronics damaged by fire.
The Aftermath of a Fire
Residential fires can be devastating to personal belongings, especially electronics. Devices such as televisions, computers, tablets, DVD players, and gaming systems can all suffer damage from fire and smoke that may not be immediately apparent.
To ensure that your electronic devices are restored and safe to use after you have had a fire, it is important to perform an effective fire cleanup process. Here are some tips on how to proceed in the aftermath of a fire.
1. Do Not Turn On Devices
It may be tempting to test your devices in the aftermath of a fire to see if they work. This is a natural impulse, but it is not advisable. Metals in your devices may have corroded due to acids found in smoke residues, which could render the devices unsafe to use. It is better to wait until after a professional has assessed the damage and included it in a comprehensive fire cleanup process.
2. Check For Smoke Damage
In addition to having corrosive acids that damage electronics, smoke can also coat the interior of your devices, which creates an insulating effect that can lead to overheating and shortcircuiting. The effects of smoke and soot can last long after the fire has been extinguished. If there are visible layers of soot on the device's exterior, it may not be salvageable.
3. Hire a Professional
The only way to ensure that your electronics are safely restored to their fullest potential is to hire a professional fire cleanup and restoration company in Kensington, CA. A trained electronics technician will be able to assess the damage accurately and determine which devices can be saved and how to save them.
By acting quickly and following these steps, you can minimize the damage to sensitive electronic devices. A professional cleanup service will help you return your home to a comfortable living space as soon as possible.
What To Do if a Commercial Toilet Will Not Stop Flushing
7/22/2022 (Permalink)
How to Stop a Commercial Toilet from Flushing
You enter a bathroom in your building and find a toilet that is flushing continuously. What do you do? There are several steps you can take to address toilet overflow. Potential solutions will depend on the type of flushometer your toilet uses: automatic or manual.
Follow these tips to diagnose the problem and find a solution.
1. For Automatic Flushometers, Perform a Simple Test
First, shut off the water by using a flathead screwdriver on the slot located somewhere on the flushometer. Depending on the model, you may need to take the cover off to find the slot.
Next, find the button that performs a manual flush and hold it down. If you hear two clicks, the diaphragm kit is malfunctioning and you need to replace it or clean it. You can find the diaphragm kit by removing the top of the flushometer.
If there is no issue with the diaphragm, you can check for a loose solenoid or contact a plumber.
2. For Manual Flushometers, Clean the Gasket
First, turn the water off with a screwdriver. Next, use a wrench to remove the top of the flushometer. Remove the gasket and clean it thoroughly, including the weep hole. If this does not fix the toilet, then you will need to replace the gasket.
3. Call a Professional if There is a Toilet Flood
A toilet overflow can cause serious damage to a commercial building if not dealt with properly. Walls and floors may deteriorate, and mold can start to grow within 48 hours. If your building in Oak Park, CA, suffers extensive water damage, be sure to contact a water restoration company that can help you remove all of the water and restore damaged property.
Following these tips will help you stop a toilet and address toilet overflow problems that stem from continuous flushing.
Five Most Common Fires in a Home
7/15/2022 (Permalink)
The Five Most Frequent Home Fires
Have you wondered what the most common fires in a Normal Heights, CA home are? We are going to break it down and sum it up for you.
Cooking
Kitchen fires are among the most common fires in a home, it is also the place where the most injuries occur in a home. It is important to remain in the kitchen at all times when using the stovetop and when using the oven you should check on your food periodically throughout the process. Remember it is not necessary to put the stovetop at the highest level of heat, but rather keep it at a balanced temperature.
Heating
Heating equipment within a home is the second leading cause of fires within a home. This is why it is important to keep anything that can burn at least three feet away from any heating equipment - especially flammable items. To avoid a fire associated with heating equipment make sure chimneys, furnaces, or any other heating appliance is inspected and cleaned properly.
Electrical
On average electrical associated fires make up for 10% of all fires in a residence in part to malfunctions in wiring, lighting, plugs, and cords.
Smoking
Smoking items such as cigars, cigarettes, and pipes started an estimated 17,200 fires in homes.
Candles
Did you know around Christmas is the peak time for candle fires… It is reported that on an average day there are 21 calls for a candle fire in a home. This is why it is recommended to keep anything 12 inches away from candles. Even though tempting does not fall asleep with lit candles and may be considering other products like essential oils.
5 Ways To Prevent a Gas Fire
6/26/2022 (Permalink)
Prevent a Gas Fire From Your Home
A home fire can be disastrous whether it was sparked by a lit candle, electrical malfunction or other accidental cause. However, one of the most dangerous causes of fire is a gas leak, which can be explosive and require extensive home repairs from a trusted fire damage restoration company. Here are five tips to prevent a gas fire from happening in your Rolando Village, CA, home.
1. Check Appliances
Oftentimes, a fiery gas explosion occurs after gas stoves are accidentally left on. If you happen to smell gas within your home, check the stove to see if a burner has been left on. If this is the case, immediately shut off the appliance to prevent a major gas fire.
2. Open Doors and Windows for Air Circulation
A simple way to protect your home from fire potential is to open up the doors and windows to promote air circulation. Proper ventilation is key to keeping any gas moving through the air instead of collecting within the home and reducing the risk of a fire.
3. Leave Lights Off
If a gas smell infiltrates the house, leave the lights off as they can create a spark that could become destructive. Stock up on flashlights for this possibility.
4. Locate Gas Meter and Shut Off
Know where your gas meter is outside the home and how to turn off the flow of gas. This is highly important when gas odors are prominent and can help keep your home and family safe.
5. Evacuate the House if You Smell Natural Gas
Even taking all the aforementioned precautions can still lead to an explosion due to a gas leak. For optimal safety, evacuate the home and gather a safe distance away if there is a noticeable gas scent.
Don't leave your home and family at risk of a gas fire. Upon smelling gas, check stoves, open up windows, keep lights off, shut gas flow off from the meter and evacuate the house.
How To Begin the Drying Process Before the Professionals Arrive
6/19/2022 (Permalink)
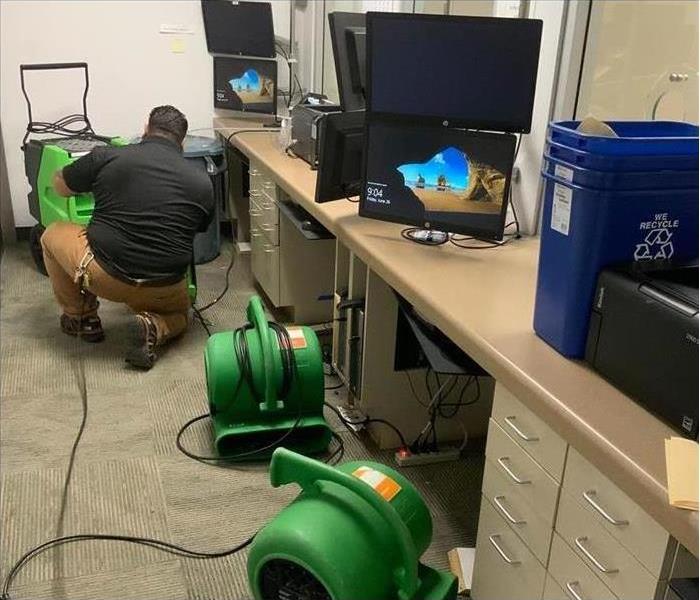 Drying office after water cleanup in Kensington, CA.
How To Begin the Drying Process Before the Professionals Arrive
When your Kensington, CA, commercial building floods from a broken pipe, time is of the essence. Water damage begins immediately and doesn't stop until you have eliminated all the moisture. You can follow several damage tips to get the process started while waiting for the professionals to arrive on the scene.
1. Practice Safety After a Pipe Burst
First and foremost, after discovering standing water, you must take precautions to ensure everyone's safety. Before implementing the cleaning tips, one essential step is to shut off the electricity to the affected area or the entire building. Otherwise, an electric current could be flowing through the water, putting anyone who contacts the water at risk.
Also, keep others, including children and pets, out of the area until it is completely restored. Limiting access will help avoid accidents.
2. Extract the Water
You must extract as much of the standing water as possible as soon as possible. People offering water damage tips often suggest using a wet/dry vacuum to remove water. If you don't have access to a wet/dry vac, you can use mops and towels.
3. Remove and Sort the Contents
Next, it's time to clear as many of the contents as possible from the affected area. This will enable you to clean more effectively and determine what is salvageable and what isn't.
4. Dry the Area and Contents
When you get the area cleared, begin the drying process. This is the most critical part of mitigating the water damage and preventing mold growth. Mold spores can start growing within 24 hours of water exposure. Disaster restoration professionals have the expertise and industrial equipment to ensure the space is dried thoroughly. You can use fresh air, fans, heaters and dehumidifiers.
Hopefully, you will never be faced with a water disaster at your business in Kensington, CA. However, knowing these damage tips beforehand can prove helpful if the worst occurs.
What You Need To Know About Pretesting
6/6/2022 (Permalink)
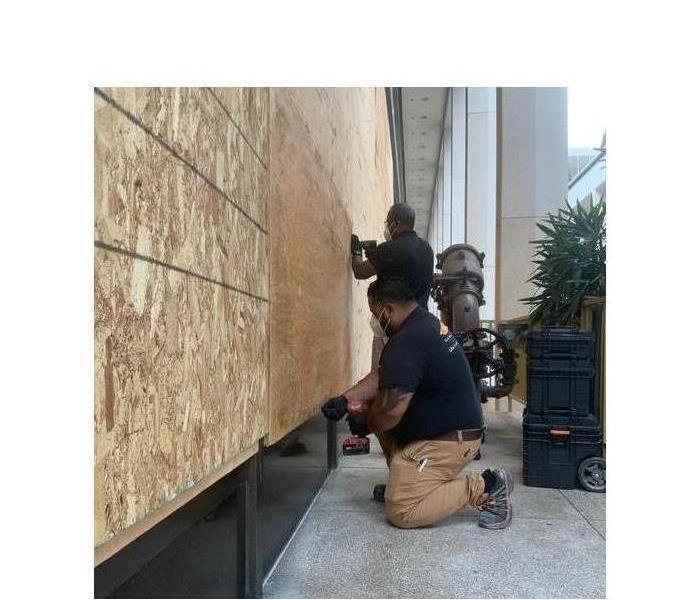 Protect your business from severe weather.
Pretesting: What You Need to Know
When your Oak Park, CA commercial property has been affected by disaster, pretesting is a crucial part of the insurance claim process. As one of the first steps that professionals take when responding to fire, smoke, or water damage, this initial testing provides vital information, including:
- The full extent of damage
- The types of damage to property, furnishings, inventory, and other belongings
- The chances of repairing or restoring affected items and areas
- The best tools and methods for cleanup and restoration
With this info at hand, property damage repair and mitigation technicians deliver accurate estimates and plans for recovery completion.
Why Your Insurance Company Values Pretesting
In addition to accessing details about the damage to your property and accurate financial estimates, your insurance agent uses the info from the pretest process to get your claim in motion. Your insurance company naturally wants the recovery process to cost as little as possible, and a quick cleanup response is crucial to a speedy recovery with minimal, if any, secondary damage.
How Initial Testing Improves Recovery Results
If, for example, this initial testing shows the cleanup and restoration professionals that there are holes in the roof or the foundation, technicians will work right away to set up temporary tarping and boarding. This ensures that further damage has been mitigated, lessened, or prevented altogether. Early testing also alerts technicians to problems that could develop. For example, water left standing in your building creates a mold risk within just a day or two.
When your Oak Park, CA, business has been affected by flooding or smoke from a neighbor's fire, pretesting is the best way to ensure that your property doesn't experience lasting damage. You'll have accurate estimates for cost and recovery, get better results from your insurance company, and prevent further unnecessary damage. SERVPRO works closely with insurance agents and understands the importance of a thorough, speedy recovery.
How Can You Protect Your Home From Roof Damage?
5/25/2022 (Permalink)
Steps To Preserve Your Roof
Of all the structural elements of your Normal Heights, CA, home, the roof is among the most important. A strong roof protects your home from the elements. It provides safety and security. If your home suffers roof damage, you need to act decisively and appropriately. Following the right steps will help ensure that you can preserve your roof.
1. Understand the Common Issues That Can Cause Damage
A well-built roof can last up to 20 years or more. However, problems can arise under certain conditions. Be aware of these so you can minimize any damage and the need to replace the roof.
Wind damage can blow off shingles. Hail damage can break shingles and put holes in the roof. Excess moisture can rot the building material. All of these issues can expose your home to flooding or other environmental concerns.
2. Inspect for Roof Damage Often
A professional should regularly inspect the roof of your Normal Heights, CA, house. In doing so, the technician can identify emerging problems and concerns, pointing out areas that need immediate attention and allowing you to get on top of any damage before it gets worse. Have your roof inspected once or twice a year. It is especially important to inspect it after heavy winds, excessive rainfall and hailstorms.
3. Hire the Right Professionals
For inspections, repairs and installations, you want a qualified team on your side. Assessing and repairing wind and storm damage requires the expertise of storm restoration professionals. The team should be ISO-certified and have experience using moisture survey technology. Make sure the company is thorough and performs a visual inspection of the membrane and flashings. You also should look for professionals who do core analysis testing.
Roof damage can have a detrimental effect on your home. There are ways to prevent significant problems. Careful attention and hiring the right people will give you peace of mind and keep your roof strong.
P.A.S.S.: The Only Fire Extinguisher Technique You'll Ever Need
5/18/2022 (Permalink)
Four Steps In Learning How To Use An Extinguisher
One of the most important tools for fire safety in a commercial property is the fire extinguisher. It is especially useful in commercial kitchens or in businesses working with a lot of flammable materials or substances. However, as important as this tool is, fire mitigation services in Rolando, CA, explain that too few people actually know how to use the tool effectively, reducing its usefulness. You can learn to use an extinguisher in four steps and with the acronym P.A.S.S.
1. Pull
To minimize fire damage, you want to use the extinguisher correctly. Before you can use the suppressant in the canister, you need to remove the pin from the handle or nozzle. To remove the pin, you only need to pull it all the way out. Removing the pin means the tool is active.
2. Aim at Kitchen Fire or Other Small Fire
Before squeezing the handle to release the flow of suppressant, you want to aim the nozzle at the fire. Do not aim the fire extinguisher high. You want to aim at the base of the flames to extinguish the fire at the cause.
3. Squeeze
To expel the suppressant, you need to squeeze the handle together. Squeezing allows the substance in the pressurized canister to evacuate the nozzle. Be sure to squeeze the handles completely. You want to release the suppressant with as much pressure as possible.
4. Sweep
As the suppressant leaves the nozzle, sweep the head back and forth across the flames. Remember to start from the base and move upwards.
A fire extinguisher is an essential piece of safety equipment and you will likely have multiple canisters on your property. As a business owner, you should ensure that all employees know how to use the tool effectively. Talk to your team about the P.A.S.S. technique, and perhaps provide a demonstration.
4 Steps To Restoring Your Home After a Leaky Water Heater
5/10/2022 (Permalink)
After a Leaky Water Heater, Follow These 4 Steps to Restore Your Home
A leaking water heater in City Heights, CA, can quickly become an emergency. Not only is the leak likely to become worse over time, but a continuous stream of warm water can easily become a breeding ground for mold and bacteria. Luckily, you can minimize damage to your home by addressing your failed water heater as soon as you notice a problem. By following these steps and knowing what to expect throughout the restoration process, your home will be back to new in no time.
1. Shut Off the Water
It is important to stop the source of the water. First, go to the circuit box and cut the electrical power to the area. Next, turn the water supply valve on the water heater to the off position. If there are any electrical hazards, such as sockets or wires underwater, do not enter the area. Instead, turn off the water to the house and call an electrician for assistance.
2. Extract the Water
Regardless of how many gallons of water have found their way onto your floor, water damage remediation experts can quickly remove the water and dry the area. Many professionals in City Heights, CA, use specialized machines to extract the water caused by a leaking water heater. Specialists may also use industrialized blowers to thoroughly dry any remaining moisture.
3. Inspect the Broken Water Heater
Once the immediate problems have been addressed, experts will inspect your water heater to determine if it can be repaired or if it needs to be replaced. The team will explain your options and may even work with your insurance company to help streamline the repair or replacement process.
4. Work With Restoration Services
Your home must be restored to its previous condition. If your floors, walls, or other building components are not salvageable, the team may install new materials. Experts may apply new paint or make other repairs before the job is complete.
A leaking water heater can cause damage to your home. Fortunately, with a team of experts, your home can be restored to its original condition in the least amount of time.
The Importance of Corporate Resources After a Large Disaster
4/27/2022 (Permalink)
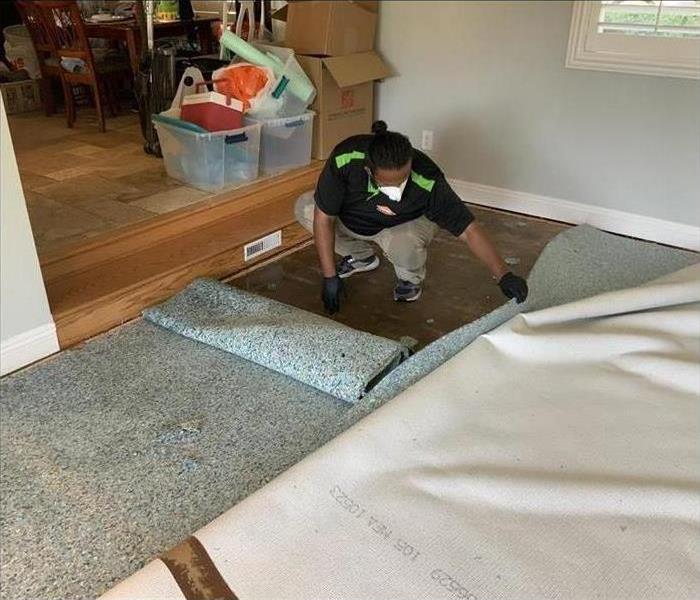 Storm damage causes carpet damage.
After a Major Disaster, Corporate Resources Are Critical
Many disasters are simply local events that impact one or two companies. These situations include localized storm issues, a company fire or a broken plumbing system in a school or office. Other times, though, a disaster impacts a much wider area with many companies and homeowners suffering a catastrophic loss all at once. The California wildfires are a good example of this widespread damage, as are the recent floods of Midland, Michigan caused by a dam breach. At this time, the 1,700 SERVPRO franchises that operate across North America often pool their resources to help the wider community. This allows more people to be helped in a timely fashion.
Corporate Strength
In a major flooding event, local franchises can become overwhelmed. When hundreds of homes and businesses are instantaneously dealing with flooded properties, only so many can be helped by the franchises in San Diego, CA. By bringing in other professional restoration service franchises, the following benefits result:
- Additional equipment
- More workers
- More expertise
- Faster response times
- Reduced damages
Overall, this results in a smaller catastrophic loss for the impacted community. A multitude of crews coming together means critical issues can be addressed without delays. More specialized equipment on hand enables crews to pump out standing water, dry out flooded areas of buildings and respond to dangerous situations.
Local Knowledge
In coordination with local resources, SERVPRO's Disaster Recovery Team mobilizes as needed to help with widespread storm damage and other issues. This has been a successful model to help devastated communities recover from large-scale events for many years. Communities across North America have benefitted from this pooling of valuable resources of equipment and knowledge. Whether it is a large hurricane along the coast or major flooding in the heartland, communities can count on a robust response from professionals.
A catastrophic loss can be minimized by a coordinated response. Local knowledge and corporate strength is a potent combination for handling disasters.
How To Take Care of Smoke Damage in Your Building
4/13/2022 (Permalink)
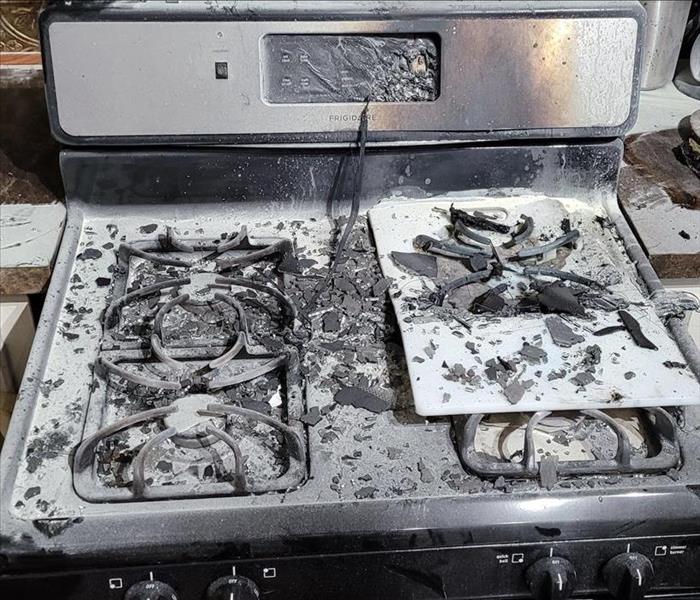 Kitchen fires can expand rapidly, damaging appliances beyond repair. SERVPRO is here to take care of the heavy lifting for you!
A commercial fire in San Diego, CA is an unfortunate situation for any business owner to deal with, even if it isn’t your business. Another part of the building that is not insured under your policy, for example, can still cause severe smoke damage in your area. Some business owners assume this isn’t a covered loss, when, in reality, the majority of commercial fire policies often cover similar losses. If you happen to find yourself in a situation where you have smoke damage from a fire you didn’t cause, here are a few pointers to make sure the damage gets taken care of.
Contact Your Insurance Company
The first thing you should do if you aren’t sure about what your insurance policy covers is to contact your insurer. Scanning your policy can be frustrating, especially when trying to navigate complex insurance jargon. Ask your agent or broker what your policy coverage entails, specifically regarding smoke damage. With a better understanding of your insurance policy, you will have a firmer handle on how to move forward and on what is covered, for future reference. Your insurance company may also refer you to licensed disaster restoration professionals who can treat the affected area of your building.
Choose a Reputable Restoration Company
Disaster restoration companies are a dime a dozen, and it’s important to make sure you’re choosing one with a good reputation and ethical standards. As mentioned before, your insurance company may refer one to you, but most insurers will not require you to use their recommendation.
Let the Professionals Handle It
One of the biggest mistakes you could make with smoke cleaning is to do it yourself. Without a professional background in restoration, you could end up doing more harm than good. A licensed restoration professional will assess the affected area for soot damage with state-of-the-art, high-tech equipment that will help them to determine which areas and items are salvageable and which need to be completely replaced.
3 Tips for Preventing Mold Growth in Your Business
4/6/2022 (Permalink)
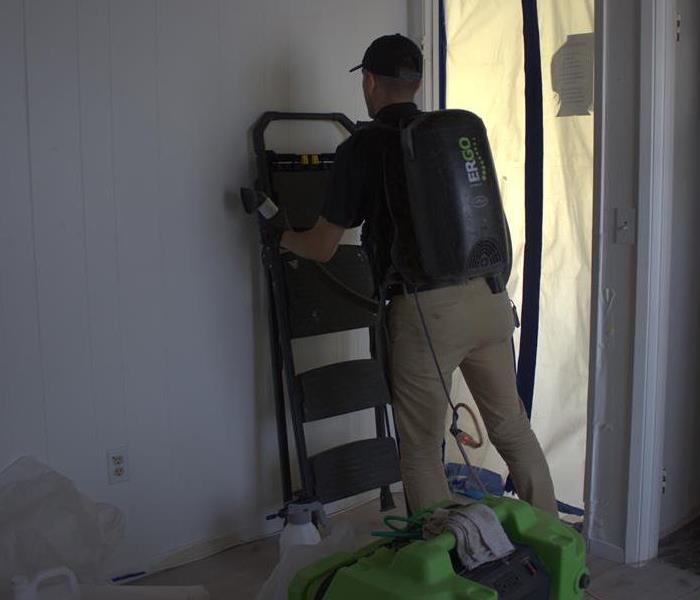 A storm caused mold growth in this home, so our SERVPRO teams responded immediately to begin containing and cleaning!
There are many ways for professionals to remediate the impact of water damage. Mold growth can occur within 24 hours of a flood, so experts in San Diego, CA need to get to work immediately to protect your building. However, commercial property owners should invest in preventing mold in the first place rather than waiting until it actually occurs. While you may not be able to stop mold from growing entirely, you can reduce the likelihood through some simple tips.
1. Have Someone Inspect Your Building Regularly
The problem with mold is that it tends to grow in dark, damp areas of buildings. You may not visit every single corner of the building frequently, so you should hire someone to come out and inspect things every so often. An annual inspection can help greatly, and a water damage restoration expert will know what to look for.
2. Decrease Moisture Levels
Depending on the city in which you do business, the air may be naturally humid all the time. This increases the chances of mold growth, but you can decrease humidity within your own building. You should consider installing a dehumidifier in rooms that are likely to have excessive moisture. Placing these items in the bathroom and basement can help tremendously.
3. Make Essential Repairs Quickly
Leaky roofs, cracked window frames and broken foundations can all increase the likelihood of mold developing. As soon as you realize a part of the building is damaged, you need to address it immediately. Even a small leak can lead to mold if you are not careful.
Ultimately, mold prevention is entirely dependent on remaining vigilant and taking care of any problematic issues as soon as they come up. It is much easier and much more affordable to prevent mold than to get rid of it. Your employees will thank you for being so proactive in addressing water damage.
You’ve Had a Commercial Fire. Now What?
3/23/2022 (Permalink)
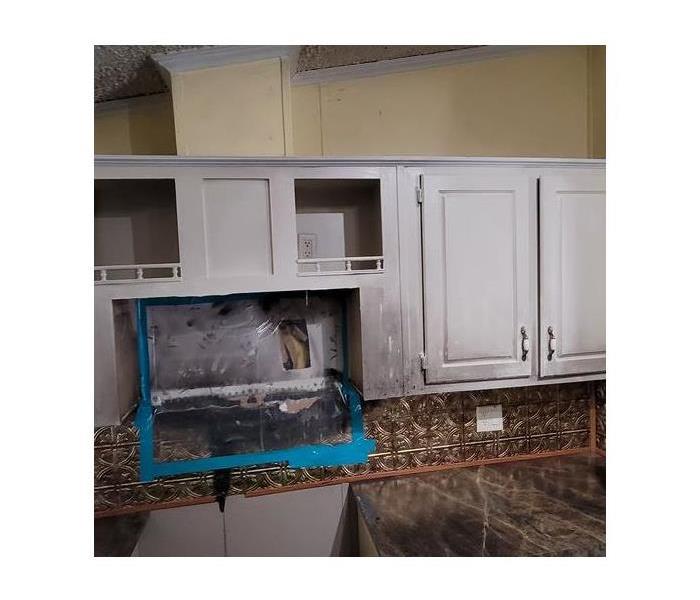 SERVPRO walks with you through every step of the fire damage restoration process! In this photo, SERVPRO has contained kitchen fire damage.
Business owners in San Diego, CA have likely considered every possibility when it comes to their insurance policy. You don’t want to have to use it, but you want to make sure you have it. Those who are in the unfortunate position of having to use their fire insurance policy can often feel overwhelmed and unsure of where to start. Thankfully, these policies are built to take care of everything and allow you to simply write the checks and sign the documents. To have a better understanding of how the process works, however, we’ve included a few tips to help set your mind at ease.
1. Your First Call
Once you’ve determined the safety of your employees, and the fire department has handled the flames, your first call should be to your insurance company. They will often have a preferred disaster restoration professional, but many will also allow you to choose whichever company you may prefer. At any rate, the disaster professionals will handle the problem from this point forward.
2. Inspection and Board-Up
Once the fire restoration professionals have arrived on the scene, they will immediately begin the inspection process. One of the most important parts of this process will be identifying the assets and belongings that can be salvaged and those that cannot. They will also assess the severity of smoke, soot and fire damage, and designate areas for smoke cleaning. Once that’s out of the way, any destroyed windows or ceilings will be covered with boards and tarps to prevent further damage from the elements.
3. Water and Fire Damage Treatment
If the sprinklers in your commercial building caused severe water damage, it will be addressed first before the smoke and fire damage. This will include state-of-the-art equipment and techniques to remove moisture from walls and surfaces. These professionals are also trained to remove soot and smoke damage from the premises as part of the fire restoration process.
4. Finishing Touches
Once the damaged items are treated, the fire restoration professionals will clean and sanitize the salvageable items in the building and attempt to restore it to its pre-fire condition, including any necessary structural repairs.
4 Typical Areas Where Mold Is Found in Commercial Buildings
3/23/2022 (Permalink)
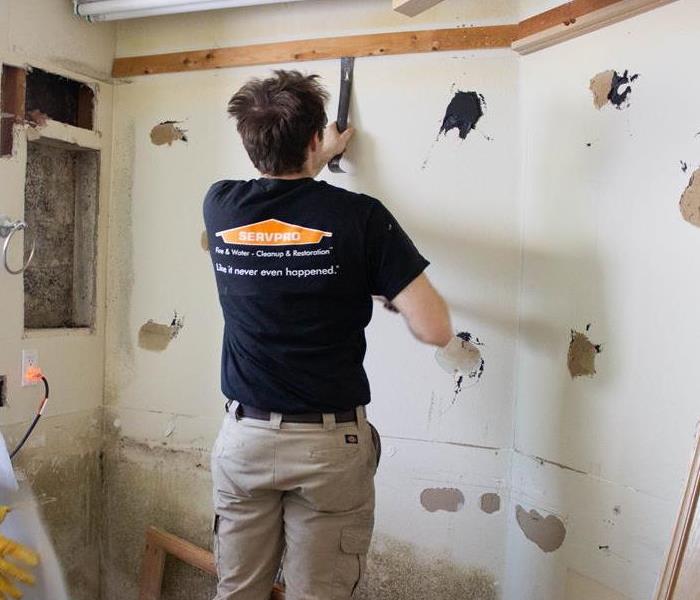 SERVPRO doesn't just remove materials affected by water damage and mold, but we get to source of the problem to prevent ongoing damage!
Even when regular cleaning and caretaking is a part of your everyday lifestyle as a building owner in San Diego, CA keeping mold away forever is near to impossible. It’s bound to show up in areas where water is commonly used and the mildew smell alone can alert you to its whereabouts. However, if no visible mold is apparent and you need to find its location before resorting to mold testing, here are four typical areas where mold can be found in commercial properties.
- Look for mold near water heaters and air-conditioning units. When coolers are used all day, specifically in large buildings where they’re often in constant use, heavy condensation and water leaks can frequently occur. Since this water lingers and seeps into the surrounding walls or floors, mold can begin to grow in unforeseen places like under the carpet or behind drywall.
- Search below bathroom and kitchen sinks. Bathrooms and kitchens see their fair share of consistent water usage, leaving a mildew smell without necessarily displaying visible mold to the naked eye. This is often the case because it’s hiding below the sink where any leaks can spring up, plumbing can become loose or caulking can go bad, needing replacement.
- Check the walls beneath leaky windows. If your building in San Diego, CA sees ample rainfall every year, you’re more likely to find mold growing below your windows. Poor insulation or leaky window frames are high areas for trapped moisture.
- Investigate basement floors or cellars that have been previously flooded. Any low-level rooms like basements that have endured flood damage leave a lot of damp walls and floor space if they’re not dried or replaced properly by professionals. Given that these areas are generally dark, receiving little sunlight or fresh air, there’s a high probability mold is present.
If no visible mold can be found and you’re intending to have mold testing done in your building, try looking in any of these typical areas where mold grows frequently. When the mildew smell can’t give away its location, any of these areas may reveal the mold you’re looking for.
The Importance of Containment During Mold Removal
3/9/2022 (Permalink)
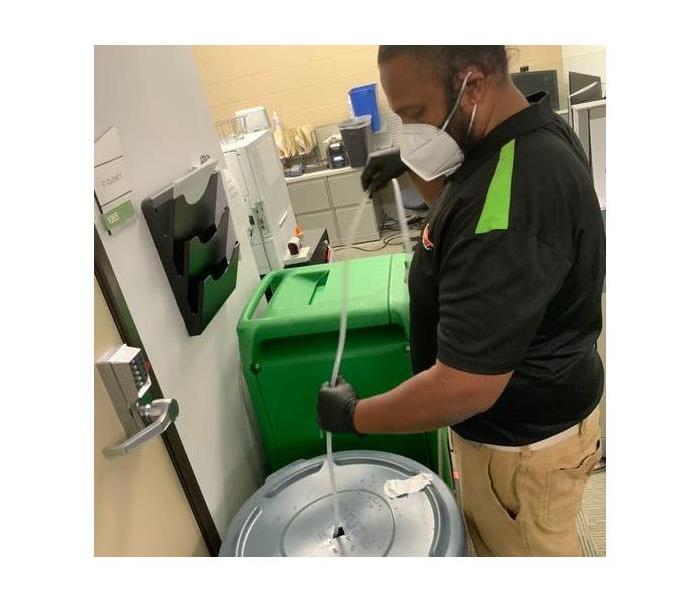 SERVPRO takes every measure to ensure that excess moisture is removed from water-damaged areas!
When mold starts to spread in your San Diego, CA business after a flood or other types of water disaster, you may not be sure how to treat or remove it. Mold cleanup can be a complicated affair, and the mold may even reappear if it is not handled properly the first time. Having mold-damaged areas professionally inspected and contained is one way to ensure the problem is eradicated quickly.
Mold Can Grow Rapidly
If mold is not contained during the cleanup process, mold spores can travel through the air and into other areas, where they might find new breeding grounds. Some of the most common, unseen spaces usually include:
- Storage space in the basement
- Interior walls damaged by water
- Inside of your building’s heating and cooling system
Because these spores can travel so easily, bringing in a company that specializes in mold remediation can help prevent further growth. Since mold can begin to grow in its new environment as soon as 48 hours after attaching, calling in professional services right away can be an important step in cleanup.
Mold Can Break Free From Damaged Drywall and Carpeting
As mold-damaged substances like drywall and carpeting are removed from your business during mold cleanup, the spores can become airborne. Once this happens, the fungus can attack other porous materials, such as acoustic ceilings and tile flooring. Keeping mold-infested substances contained can prevent spores from finding a new foothold in other areas of your business.
Commercial Cleansers May Not Kill Mold Completely
Calling for professional mold containment can be an important step in preventing future issues. Mold contamination may not always respond to commercial cleansers, and the mold presence in your building may require more drastic treatment. Negative air pressure and specialized chambers can isolate areas that have been affected by mold and prevent it from reforming and spreading.
Mold cleanup can be a complicated process, especially when it comes to keeping affected areas contained. Leaving these areas closed off and calling in professional mold remediation services can help prevent the spread of mold and restore your San Diego, CA business to its former glory.
3 Steps for Discussing Mold Damage With Your Insurance Company
3/2/2022 (Permalink)
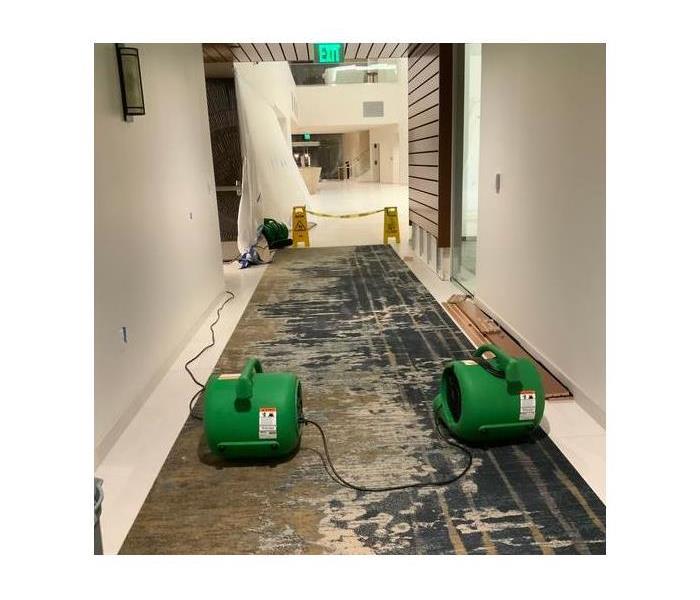 SERVPRO brings in customized equipment to help stabilize areas affected by flooding or mold and remediate excess moisture.
After a flood damages your San Diego, CA business, you may not be sure which steps to take when it comes to cleanup and filing an insurance claim. Of all the damage you might encounter, one of the most puzzling can be fungus growth. No matter the amount of mold you are dealing with or where it might have taken hold on your property, knowing how to report the issue to your insurance company can help you take the necessary steps to resolve the problem.
1. Do Not Touch the Damaged Areas
Before you call the insurance company, you might want to take photos of any mold damage you find. However, it is important that you do not physically disturb these areas. If you see mold where you cannot reach it without moving tables, chairs or equipment or possibly sending spores into the air, leave it for the insurance company to photograph and provide an explanation before you move on with filing a claim.
2. Discuss Coverage Options With an Agent
Understanding your insurance company’s policies on fungus growth and what they generally cover for your business can be an important step in filing a claim. You may want to sit down with an experienced agent and go over your current policy regarding the kind of mold coverage you can receive after you file your claim.
3. Discuss Cleanup Plans
Your insurance agent may be interested in what your cleanup plans are once you file your claim. He or she may ask if you plan to use professional mold remediation services and how you plan to handle safety issues that might relate to the process. Keeping your mold insurance providers in the loop about your cleanup efforts may assist them with processing your claim faster.
Dealing with fungus growth in your San Diego, CA business after water damage can be frustrating. However, working closely with your insurance company can help get your business up and running again with a minimum amount of hassle.
Signs, Symptoms and Causes of Indoor Mold Growth in Commercial Spaces
2/23/2022 (Permalink)
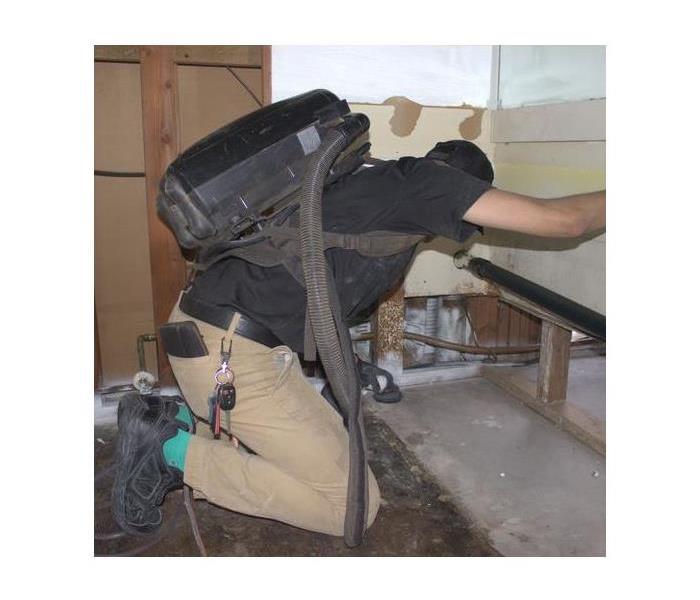 Our highly trained professionals are equipped to remediate any mold damage loss!
Indoor mold growth due to moisture is a common issue for many businesses in San Diego CA, whether it is caused by broken pipes or broken supply lines, high humidity levels or storm-related flooding events. To protect your property, you should know these key factors in recognizing risks and some methods to prevent mildew and address fungal infestations.
Sources of Indoor Mold
Mold and mildew are propagated through tiny, microscopic spores that are ubiquitous in both indoor and outdoor spaces. Moisture and oxygen are all that are required for these fungal invaders to take foothold on nearly any surface that contains an organic nutrient source. This includes food, paper and wood as well as building materials like insulation, drywall and carpeting. While major flooding events are one major source of mold issues, small leaks and even high humidity can be enough to create an ideal environment for growth.
Risk Factors
When it comes to minimizing the spread of aggressive mildew or mold strains, early detection is essential. While mold can take hold nearly anywhere in a building, these are common areas to inspect for visible signs:
- Tile grout and wallpaper seams
- Window sills
- HVAC drip pans
- Ceiling corners
Wall switch plates
Additionally, any areas that show evidence of water damage should be monitored carefully. In many cases fungal colonies grow behind the scenes, whether behind wallpaper or tiling or within insulation and drywall, rotting structural elements from the inside out.
Remediation Processes
Whether you only notice a distinctive musty smell or your building is having issues with water damage from broken pipes or flooding, it is important to contact a professional mold remediation company as soon as possible to minimize restoration complications and costs. These trained specialists will be able to quickly assess the extent of damage, remove standing water, identify strains of mold or mildew present and perform thorough dehumidification of affected spaces to eliminate all residual moisture.
What to Expect from the Fire Cleanup Process
2/16/2022 (Permalink)
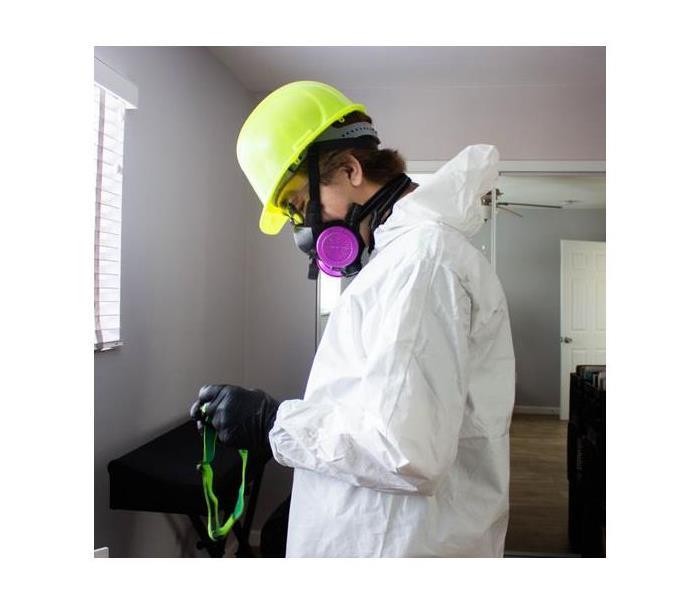 Our SERVPRO teams suit up to clean up any fire damage!
As if a commercial fire in San Diego, CA weren’t enough of a nightmare, the cleanup process can be difficult to deal with if you aren’t properly prepared or informed. Whether it’s dealing with insurance companies or keeping track of all the damaged or destroyed assets, it’s important to know the proper procedure in such an event. Here are a few tips to keep in mind to make sure you’re up to speed on what the fire cleanup process will entail:
1. Emergency Contact
Once you’re sure all your employees are safe and the fire is gone, your first point of contact should be a fire and smoke damage restoration professional. Such an organization will inspect the property for fire and soot damage, including what can be salvaged or what needs to be replaced.
2. Board-Up and Roof-Tarp Service
Depending on the severity and extent of the smoke damage, the restoration professional will begin the smoke cleaning process by boarding up missing windows and walls, as well as placing tarps on damaged roofs. This protects the property from the elements and increases security for the professionals to do their work.
3. Water Removal
Most commercial buildings are fitted with sprinklers in the event of a fire. This can do wonders in preventing severe fire damage but can also cause water damage. In such an event, restoration professionals will treat and dry the affected area.
4. Smoke and Soot Removal
Using specialized equipment and techniques, the restoration professionals will treat all surfaces, including walls and ceilings, for soot and smoke damage.
5. Cleaning and Sanitizing
All items that weren’t completely destroyed by the fire or smoke will then be cleaned. A high-quality restoration professional will use specialized techniques and equipment that will restore mildly damaged belongings to their pre-fire condition. This will also involve odor removal.
6. Restoration
The final step, restoration, involves minor or extensive repairs of drywall and other affected structural areas to return the building to its pre-fire condition.
Content Cleaning After Fire Damage
2/9/2022 (Permalink)
In the wake of a fire, your property isn’t endangered only by damage from the fire itself; smoke and soot residue can ruin the contents of your commercial building if left untreated. Fire restoration professionals in San Diego, CA provide content cleaning services to assess the damage and swiftly address what can be restored to pre-fire condition to avoid costly replacements and save unique items.
Protecting At-Risk Content
Preemptive measures go a long way in preserving valuables from fire and smoke damage, especially with sensitive or unique items that can’t feasibly be restored or replaced. Here are some steps for proper content storage and consulting work for business owners:
- Keep important documents in fireproof safes and back them up digitally or physically whenever possible.
- Regularly take inventory for insurance claims. Photo or video documentation is particularly useful for working with insurance adjusters in fire damage cases. Back these up as well.
- Understand and regularly check on your insurance policy to know what is and isn’t covered.
Know who to contact for immediate fire restoration response in case of emergency.
The Contents Restoration Process
Restoration teams use a variety of tools and methods for efficient content cleaning after fire and smoke damage hits your property. The steps taken include:
- Assessment of property and contents to determine what can be restored
- Dry cleaning to remove light residues from clothes and porous surfaces
- Wet cleaning for surfaces with moderate to heavy residues
- Foam cleaning for sensitive fabrics
- Immersion cleaning for small nonporous items
- Abrasive or ultrasonic cleaning for heavier residues on objects that can withstand it
Move-Out Procedures
If your commercial building in San Diego, CA is heavily damaged, the restoration team may perform a move-out procedure to evacuate contents while the building itself is being remodeled and restored. This allows content cleaning independently of the on-site restoration and also protects the moved items from further damage. The team will coordinate this with you to best suit your insurance and business needs.
Why Do Restoration Workers Board Up a Building After a Fire?
2/2/2022 (Permalink)
You may have walked by a burned-out building after a commercial fire in San Diego, CA, and wondered why all the windows were boarded up. It isn’t very aesthetically pleasing, but does it actually serve a purpose?
As it turns out, boarding up a recently burned property is a very important part of the fire damage restoration process. To understand the value of the board-up service, it’s helpful to get a clearer understanding of the fire restoration process as a whole. Here is a brief rundown of the fire damage restoration process as it relates to board up service:
Thorough Inspection
Before the boards and tarps go up, fire restoration professionals scan the affected area with state-of-the-art equipment that gives them accurate readings as to the levels of soot, smoke, and fire damage in the premises. This provides them with a solid grasp on which items and belongings are salvageable and which are too far gone. Many of the items, because they are salvageable, still have inherent value, and it’s important to protect them.
Boarding Up for Safety
Once the affected area has been assessed for the severity of damage and salvageability of items, restoration professionals will board up any destroyed windows and place tarps over destroyed ceilings. This serves multiple purposes.
Perhaps most important, this helps protect damaged items from further elemental damage, particularly from precipitation. Statistically speaking, looting is also a serious problem with burned-out commercial buildings as well. Looters may not have the equipment to tell them whether an item is salvageable or not, but it usually won’t stop them from stealing.
This also creates a secure environment for fire restoration professionals to work in, as the fire cleanup process is very involved and often difficult work. Once the area has been boarded for security and safety purposes, professionals will get to work on restoring items and structural areas to their pre-fire condition.
Business Claims: Making a Disaster Claim
1/26/2022 (Permalink)
Making a Disaster Claim in Business
While a blaze burning through your facility and your inventory is devastating enough, the fire damage can leave your property and your business boarded up for months. This is why it is essential to start the fire claim process immediately so that you can minimize the extent of the business interruption and get back to work quickly.
1. Call Your Insurer
While the first calls you make are to emergency services and family, the third call you should make after a fire is to your insurer. You want to make this call immediately after a fire to ensure that the claims process is initiated at the earliest possible moment. The longer you wait to make a claim, the longer it will take to get your business up and running.
2. Mitigate Further Damage and Loss
After you initiate the fire claim, you will want to get a fire restoration specialist from the San Diego, CA, area on the scene to board up and tarp your facility, mitigating further damage and loss. If you already have a plan in place with a restoration expert, then call them and get the process started. Keep in mind that your insurer may require you to mitigate further loss, meaning that if you don’t, then your coverage may not kick in.
3. Keep Receipts
As you begin the cleanup, be sure to track all of your expenses by saving and tallying all receipts. When the adjuster arrives, they will want a full record of the damages incurred and the mitigation efforts made to reduce further property loss and damage.
4. Make a Record of Loss
Additionally, you should walk your property, photographing all damages to show your insurance adjuster. This record of loss will be used when evaluating your claim. You should also include any relevant receipts for the damaged property so your insurer can create an accurate valuation of the overall loss.
A fire claim may seem like a confusing process, but as with every bureaucratic process, there are appropriate steps to take. After a fire, just make sure to call your insurer, mitigate further damage, keep receipts and make a record of loss.
How To Operate a Fire Extinguisher Safely
1/24/2022 (Permalink)
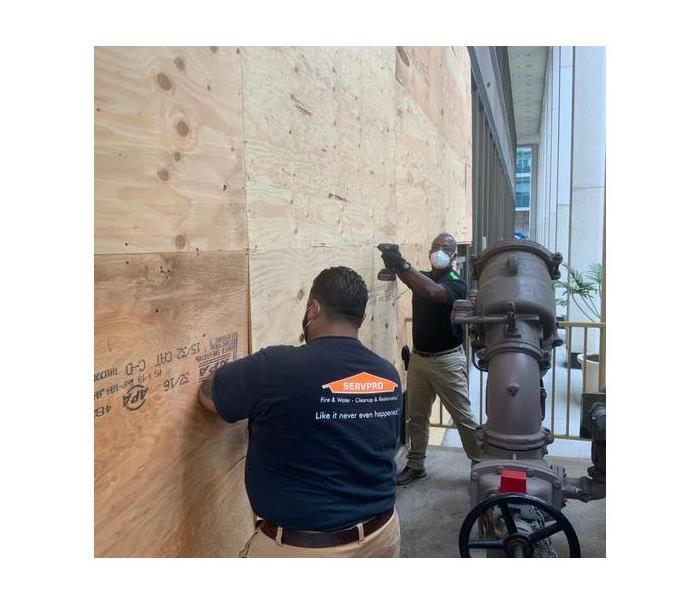 SERVPRO is here for you for every step of the fire restoration process, from boarding up broken windows to reconstruction!
A commercial fire in San Diego, CA is one of the most tragic and frightening things that can happen. Most business owners have an insurance policy to restore their assets in the event of a fire, but what about preventing it from destroying the building in the first place? By law, commercial buildings are equipped with a fire extinguisher, but many people aren’t sure how to use them or, just as important, when not to use them. Here are a few tips for avoiding excessive fire damage and knowing when to leave it to the fire department.
- Call the fire department if appropriate. A small kitchen fire isn’t necessarily a reason to call the fire department, but if the blaze has consumed more than a small amount of space, it’s better to call before you address the fire yourself. It’s also wise to contact a fire restoration professional.
- Identify a safe escape path before approaching the fire. Don’t allow yourself to become trapped before you attempt to fight the fire. Even while using the fire extinguisher, keep an eye on your path so you can make your escape before fire or smoke fills it.
- Make sure you’ve chosen the right kind of fire extinguisher. Contrary to what many assume, there are many variations of fire extinguishers intended for different fires. For example, a fire in ordinary combustibles such as paper, cloth and plastics requires water extinguishers labeled A. Fire extinguishers labeled B and C, however, are intended for flammable liquids and electrical equipment, respectively.
- Use the P.A.S.S. technique. Proper utilization of a fire extinguisher follows four simple steps. “P” stands for “pull” and refers to the pin that will break the tamper seal. “A” stands for “aim.” Make sure the hose is pointed low, at the base of the fire. The first “S” stands for “squeeze,” referring to the handle, which releases the flame retardant. The second “S” stands for “sweep,” referring to the side-to-side sweeping motion that may most effectively fight the fire. Continue this motion until the fire appears to be out. If the fire reignites, repeat the steps.
The First Steps To Take When Your Kitchen Floods
1/10/2022 (Permalink)
Steps To Take If Your Kitchen Floods
There are a few clear signs that you have a leak under your kitchen sink. You may hear drips of water even after you turn off the faucet. The bottom of your cabinet may be wet. If the leak is big, you may even see some flooding. Once you notice these signs in your home in Clay Park, CA, there are three steps you need to take immediately in order to prevent as much damage to your kitchen as possible.
1. Shut Off Water
The less water you have bursting out of the leaky pipe, the less damage it can cause. To halt the progression of the problem, turn off the water at its source. Cut off the supply on the wall, or, if that’s not possible, turn it off at the main. By preventing the flow of water in the home, you can minimize damage.
2. Call Insurance Agent
After the water feeding the flooding has ceased, it is time to call your insurance company to report the problem. You can file a claim for any damage caused by a sudden pipe leak. As long as you can prove it is not a long-term problem and it is not a result of your negligence, your homeowner’s policy is likely to cover the costs of repairing the damage.
3. Call Repair Personnel
In the interest of preventing further damage to your home, place a call to water restoration specialists. These experts assess the damage, propose possible solutions and take your kitchen repair from water extraction to structure restoration. If they start the repairs quickly, you may be able to avoid secondary damage such as mold growth in your home.
A leak in your kitchen can lead to flooding and significant water damage. When you notice a leak has occurred under your kitchen sink, shut off the water source and call your insurance company and repair specialists to get your home back to normal as soon as possible.
Staying Safe This Flood Season
1/5/2022 (Permalink)
Keeping Safe During the Flood Season
Hopefully, you've prepared your home for potential flooding in Colina Del Sol Park, CA, this year, but now it's time to prepare yourself. The importance of brushing up on flood safety information before disaster strikes cannot be overstated. Here are four safety tips to ensure your well-being if your home is affected by flooding.
1. Watch out for floodwater. Assume any floodwater you see is contaminated. These waters may have come into contact with sewage or other hazardous materials (such as chemicals). Debris carried by the water may have sharp edges, and dangerous insects or animals could be lurking just under the surface. Floodwater is also much stronger than it seems. Do not attempt to wade through moving water; you can quickly be knocked over or swept away.
2. Use good judgment around electricity. Always turn off all power and gas before entering a flood-damaged home. Never attempt to use electrical appliances that have come into contact with floodwater until they have been checked for safety. Avoid downed power lines and keep yourself far away from any standing water in their vicinity.
3. Know how proper sanitation affects your health. Sound flood safety practices include discarding any flooded items that cannot be sanitized. This includes water-retentive objects like rugs and stuffed animals, cosmetics and toiletries, and any wooden kitchen utensils. Always inspect and disinfect packaged food before use. Even things that appear to be sealed may have punctures or cracks you cannot see. If you just don't know, let it go.
4. Be mindful of physical dangers. Most serious accidents occur during the clean-up process. Be careful when moving heavy waterlogged objects, wear protective clothing to avoid cuts, and don't do anything that might result in a dangerous fall. It's always safer to consult with restoration experts before attempting difficult cleanup procedures yourself.
Though you'll want to quickly survey any damage and begin cleaning up immediately after a flood, the most important part of any post-disaster restoration is assuring your family's well-being with proper flood safety. It is always possible to repair your home. It may be more difficult to repair your health.
 Protect your business with a safety plan! Contact SERVPRO® for expert guidance on fire prevention and ensure your employees and property stay safe.


 24/7 Emergency Service


