Recent Water Damage Posts
The Role of Insurance in Water Damage Restoration
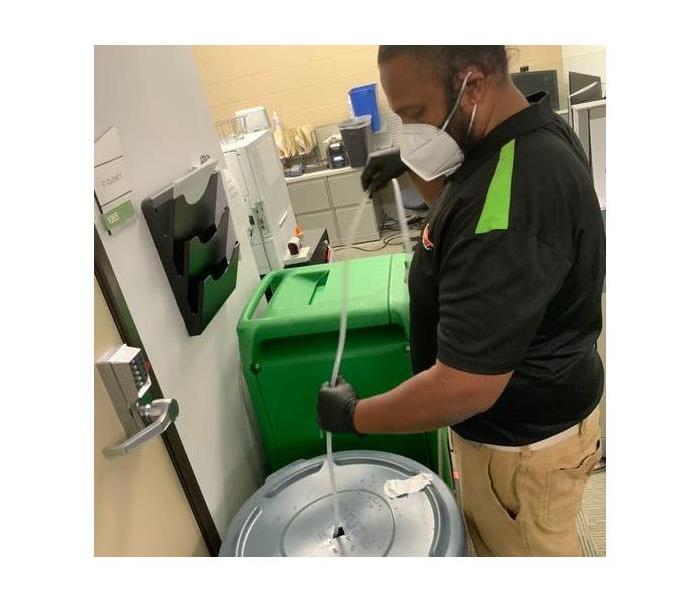
6/12/2024 (Permalink)
 Your insurance coverage plays a major role in water damage restoration, and our team can help you out with it!
Water damage can occur unexpectedly, posing a threat to your property and belongings. In such situations, having the right insurance coverage can make a significant difference in the restoration process. Understanding the role of insurance in water damage restoration is crucial for homeowners and business owners alike. In this blog, we will explore the importance of insurance in water damage restoration and how it can help mitigate the financial impact of such incidents.
Types of Insurance Coverage
Different types of insurance policies provide coverage for water damage. The primary ones include:
- Homeowners Insurance: Most standard homeowners insurance policies cover water damage caused by sudden and accidental incidents, such as burst pipes or appliance malfunctions.
- Flood Insurance: Flood damage is typically not covered by standard homeowners insurance. Residents in flood-prone areas are encouraged to obtain separate flood insurance policies to protect their properties from damage caused by rising waters.
- Commercial Property Insurance: Business owners can protect their properties from water damage through commercial property insurance, which typically covers water damage caused by burst pipes, roof leaks, or other covered perils.
Assessing Coverage
Understanding the specifics of your insurance coverage is essential. When faced with water damage, it is crucial to assess your policy to determine the extent of coverage for the damage. It is advisable to be aware of any limitations or exclusions that may affect your coverage for water damage incidents.
Filing an Insurance Claim
In the event of water damage, filing an insurance claim promptly is vital. When filing a claim, it is important to provide detailed documentation of the damage, including photographs and a thorough inventory of the affected items. Additionally, engaging the services of a professional water damage restoration company can help facilitate the claims process, as they can provide comprehensive documentation and estimates for the restoration work.
Working with Restoration Professionals
Reputable water damage restoration companies often have experience working with insurance companies. They can assist in the claims process by providing accurate assessments, cost estimates, and supporting documentation. Working with professionals can help streamline the restoration process and ensure that the necessary repairs and remediation work are conducted promptly and effectively.
Maximizing Insurance Benefits
Making informed decisions when it comes to insurance claims can help maximize your benefits. It is advisable to keep records of all communication with the insurance company, including claim forms, estimates, and receipts for any expenses related to the restoration process. Maintaining thorough documentation can help ensure that you receive fair compensation for the restoration of your property.
In conclusion, insurance plays a crucial role in water damage restoration by providing financial protection and assistance in the event of unforeseen incidents. Understanding your insurance coverage, filing claims promptly, and working with professional restoration experts can help mitigate the impact of water damage and expedite the restoration process. If you require assistance with water damage restoration, contact SERVPRO® for reliable and professional restoration services.
Under the Weather: Tackling Roof Leaks and Water Damage
2/11/2024 (Permalink)
 A leaky roof is more than a minor inconvenience; it's a gateway for potential water damage.
A leaky roof is more than a minor inconvenience; it's a gateway for potential water damage. Detecting and addressing roof leaks promptly is crucial for preventing extensive damage and costly repairs. In this blog, we explore the importance of regular roof inspections, the common causes of roof leaks, and effective repair strategies to keep your home dry and secure.
The Significance of Roof Inspections
Regular roof inspections are the first line of defense against water damage. They allow homeowners to identify potential issues early, preventing minor leaks from escalating into major problems. Schedule inspections at least twice a year, ideally in the spring and fall, and after severe weather events.
Common Causes of Roof Leaks
Understanding the common culprits behind roof leaks empowers homeowners to address issues promptly. Some prevalent causes include:
- Damaged or Missing Shingles
- Aging Roofing Materials
- Flashing Issues
- Clogged Gutters
Early Detection
Identifying roof leaks in their early stages is crucial. Look for signs such as water stains on ceilings, discolored walls, or peeling paint. During inspections, pay attention to the condition of the roof, checking for loose or damaged shingles, deteriorated flashing, and any other visible issues.
DIY Repairs vs. Professional Assistance
While some homeowners may attempt DIY roof repairs, it's crucial to assess the complexity of the issue. Simple tasks like replacing a few missing shingles may be manageable, but more intricate problems, such as flashing issues or widespread damage, often require professional expertise. Roofing professionals can conduct thorough assessments and provide long-lasting solutions.
Flashing Repairs
Damaged flashing can compromise the integrity of your roof. Professional roofers can assess the condition of flashing and make necessary repairs or replacements to ensure a watertight seal around vulnerable areas. Clogged gutters and downspouts are also a common cause of roof leaks. Regularly clean out debris, ensuring unobstructed water flow.
In cases of sudden roof damage, such as severe storms or fallen branches, it's crucial to address emergency repairs quickly. Tarping or covering damaged areas can provide temporary protection until more extensive repairs can be conducted.
With regular inspections and timely repairs, homeowners can protect their homes against these threats. By staying vigilant, promptly addressing issues, and seeking professional assistance when needed, you ensure that your roof remains a strong protector, keeping your home dry and secure for years to come.
How To Improve Your Indoor Air Quality After Water Damage
10/10/2023 (Permalink)
 Restoring indoor air quality after water damage is crucial for your well-being.
Water damage can be a distressing experience for homeowners in San Diego, but it's not just the visible damage that's a concern. Water intrusion can also compromise your indoor air quality. In this blog, we'll explore the steps you can take to restore indoor air quality after water damage in your San Diego home.
Understanding the Impact on Indoor Air Quality
Water damage can introduce a variety of pollutants into your home's indoor air, including:
Mold Spores: Moisture creates the ideal conditions for mold growth, and mold spores can easily become airborne and spread.
Bacteria and Pathogens: Contaminated water can carry harmful bacteria and pathogens, posing risks.
Dust Mites: Increased humidity levels can promote dust mite populations.
Steps to Restore Indoor Air Quality After Water Damage
Ensure Safety
Before tackling air quality restoration, ensure your safety by turning off electrical power if necessary and wearing appropriate protective gear.
Remove Standing Water
The first step is to remove standing water and moisture. Use pumps, fans, and dehumidifiers to expedite the drying process.
Address Mold and Mildew
Mold and mildew can thrive in damp conditions. Inspect your home for visible signs of mold and mildew and address them promptly through professional remediation.
Ventilation
Increase ventilation by opening windows and doors, and using fans to circulate air. Good airflow helps remove pollutants from your indoor environment.
Dehumidification
Maintain indoor humidity levels below 50% to discourage mold, bacteria, and dust mites. Use dehumidifiers if necessary.
Clean and Disinfect
Clean and disinfect surfaces thoroughly to remove contaminants. Use appropriate cleaning agents to ensure effective disinfection.
Air Purification
Consider using air purifiers with HEPA filters to trap airborne particles, including mold spores and bacteria. Ensure your HVAC system has a clean filter.
Professional Assistance
In severe cases of water damage, it's wise to seek professional assistance. SERVPRO® of Mid-City San Diego specializes in water damage restoration and indoor air quality improvement.
Restoring indoor air quality after water damage is crucial for your well-being. While you can take several steps on your own, for the most effective and thorough restoration, consider enlisting the expertise of professionals like SERVPRO® of Mid-City San Diego. Our team has the knowledge, experience, and equipment to address water damage and its impact on indoor air quality, ensuring your home is safe and comfortable once again. Remember, prioritizing indoor air quality is a significant step in the recovery process after water damage.
Signs of a Shower Leak: How to Detect and Address the Problem
7/13/2023 (Permalink)
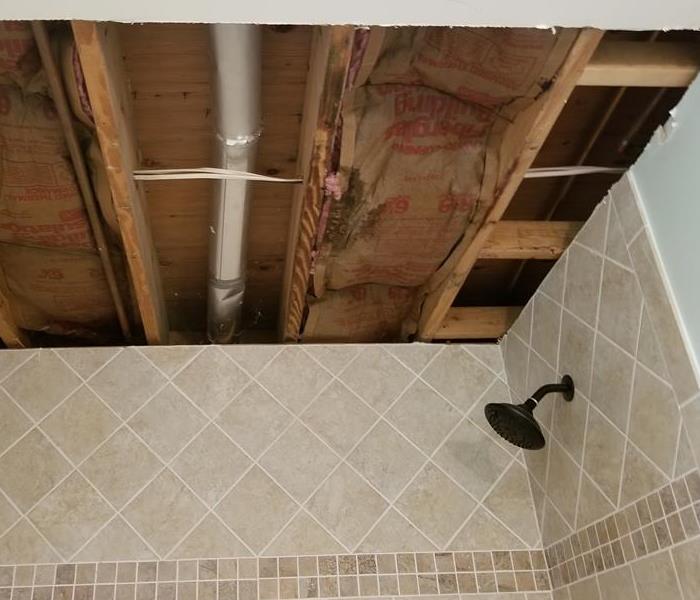 Detecting a shower leak early can prevent water damage to your home or business.
A shower leak can cause extensive damage if left undetected and untreated. It not only leads to water wastage but can also result in structural issues, mold growth, and increased utility bills. Identifying a shower leak early on is crucial to prevent further damage and the need for costly repairs. In this blog post, we will discuss common signs that indicate a shower leak, helping you take prompt action and resolve the issue before it escalates.
Damp or Discolored Walls and Floors
One of the primary signs of a shower leak is the presence of dampness or discoloration on the walls and floors surrounding the shower area. If you notice water stains, peeling paint, or bubbling wallpaper, it is likely an indication of water infiltration from a leak.
Excessive moisture from a shower leak creates an ideal environment for mold and mildew growth. If you notice mold or mildew developing on the walls, ceiling, or grout lines in your bathroom, it could be a sign of a hidden shower leak. Pay attention to musty odors as well, as they often accompany mold growth.
Loose or Damaged Tiles
Water seeping through a shower leak can cause tiles to become loose or damaged. If you notice any tiles that are cracked, loose, or coming off the wall, it may be a result of water damage caused by a leak. Inspect the grout lines as well, as deteriorated or missing grout can indicate water penetration.
Spongy or Soft Walls
When water infiltrates the walls due to a shower leak, it can cause the paint to peel, bubble, or become discolored. Keep an eye out for these signs, especially near the shower area or on adjacent walls.
If you press against the walls surrounding the shower and they feel spongy, soft, or give in under pressure, it indicates moisture damage caused by a leak. Moisture weakens the structure of the wall, causing it to lose its rigidity.
Increased Water Bill
A sudden spike in your water bill without any significant changes in water usage patterns can be an indication of a hidden shower leak. Monitor your water bill closely and investigate further if you notice an unexplained increase.
Visible water pooling or puddles on the bathroom floor, even after you have used the shower, suggests a leak. Ensure that there are no other sources of water causing the pooling, such as a dripping faucet or an overflow issue.
Water Stains on the Ceiling or Lower Levels
If your shower is located on an upper floor, water from a shower leak can travel downwards and cause stains on the ceiling or walls of lower levels. Check for water stains or discoloration on the ceiling below the shower area.
What to Do If You Suspect a Shower Leak:
- Inspect the shower area carefully for any visible signs of leaks or damage.
- Check the caulking and grout around the shower, ensuring they are in good condition.
- Test the showerhead, faucets, and valves for any signs of dripping or leakage.
- Consider hiring a professional plumber or contractor specializing in water leak detection to perform a thorough inspection if you are unable to identify the source of the leak.
- Promptly address any identified issues by repairing or replacing damaged components, such as caulking, grout, or shower fixtures.
Detecting a shower leak early on is crucial to prevent further damage and avoid costly repairs. By paying attention to signs such as dampness, discoloration, mold growth, loose tiles, peeling paint, soft walls, increased water bills, water pooling, or stains on lower levels, you can identify a shower leak and take prompt action. It is important to address the issue promptly by repairing or replacing damaged components to mitigate any potential damage and ensure the integrity of your bathroom. Remember, if you're uncertain about the source or extent of the leak, it's best to consult a professional to accurately diagnose and resolve the problem.
How do you keep pipes from freezing?
3/8/2023 (Permalink)
There's nothing worse than taking a shower and then realizing that there's no hot water. Or worse, you may find yourself trying to take a shower in freezing cold conditions and discovering that the water from your faucet has turned into ice. While this isn't an everyday occurrence for most people, it does happen occasionally. In this article, we'll talk about how to keep your pipes from freezing so that your home stays warm during those cold winter months.
Insulate pipes and keep the heat turned up.
The best way to keep pipes from freezing is to insulate them and keep the heat turned up. Make sure you have enough insulation around your pipes, which means wrapping them in foam or fiberglass wool. You should also make sure that any air leaks are sealed up before winter hits so that heat doesn't escape through these cracks.
When it comes to keeping your home warm enough for your plumbing system, that means keeping an eye on things like drafts coming in from windows or doors; if you can feel cool air blowing against parts of your house, then it's time for some weatherstripping or caulking. If possible, try not leaving any gaps between window frames where cold air could get into the house. This will help prevent freezing temperatures from affecting those exposed pipes under the house.
Adequate insulation on the pipes in the crawl space.
If you have a crawlspace, make sure there's adequate insulation on the pipes in that space. If not, add some! Insulation should be at least 6 inches thick and cover all sides of the pipes.
exterior pipe insulation
If you have an exterior pipe, cover it with insulation. The best way to do this is with foam insulation. You'll want to make sure the foam isn't too thick or else it won't be able to keep the water flowing through your pipes warm enough. If this is an option for you, consider using a heat tape along with your new layer of protection so that no matter how cold outside gets (or how much snow piles up), there will be no need for concern about frozen pipes.
No Small Openings
To keep your pipes from freezing, you should make sure that there are no small openings for air to get in around your pipes, especially if you have underground pipes and pipes in unheated spaces like crawlspaces or attics.
You can insulate the entire length of any exposed pipe with insulation that's made for outdoor use. If possible, insulate the crawlspace under your house so that heat doesn't escape through those areas. This will help keep both hot water tanks and furnaces warm enough to avoid freezing temperatures inside them as well!
Don't Turn the Water On
If you have frozen pipes, don't turn on any water until SERVPRO has arrived. Turning on the faucet can cause a pipe to burst or crack and begin leaking immediately. If this happens, shut off the water and call us right away so that we can fix it before more damage occurs
Frozen pipes can be very dangerous to your home so take care to protect your home when it's cold out. If you have any questions about how to keep your pipes from freezing or if you have any other plumbing issues, contact SERVPRO today. We are here 24/7 and ready to help!
What Are the 3 Categories of Water Damage?
12/5/2022 (Permalink)
What Are the Three Types of Water Damage?
Water damage can be serious, especially if it is not dealt with quickly. It is important to know the difference between the three categories of water damage so that you can get the right help. Classifying the kind of water damage that has occurred is important because it helps you determine what you should do next. The more information you have, the better equipped you are to make an informed decision about what to do with your property.
Category 1 Water – “Clean Water”
Category 1 Water is water that has been used for drinking, washing or other household purposes. This type of water is not harmful to your health or the environment and does not require any cleanup.
Category 1 water includes:
- Water from the kitchen sink faucet when you are washing dishes
- Water from your bathtub after showering
- Water from a toilet flushed without any waste matter in it
Category 2 Water – “Gray Water”
This type of water is mainly comprised of toilet waste, but it's not as dangerous as black water because it contains less harmful bacteria. However, gray water can still contain harmful bacteria, viruses, and parasites.
Category 3 Water – “Black Water”
Category 3 water is the worst kind of water damage. It’s usually caused by sewage or flood waters. If you see any signs of black water, get out of your house immediately and call us! We can help you identify what needs to be done to fix your home so that it will be safe again after dealing with this type of disaster.
Call SERVPRO of Mid-City San Diego
If you have a water damage emergency, call us as soon as possible. We are available 24/7, and we will be happy to send one of our highly trained technicians out to your home or business in San Diego, CA to provide a free estimate. With over 1,700 Franchises in the United States and Canada, we can be there quickly in times of need, no matter the time or day.
We offer complete services for any type of water damage—from leaks in the kitchen or bathroom to flooding from heavy rain and storms—and our technicians are ready with the right equipment to do the job.
Water damage can be devastating to your home or business. The first step to getting your property back to normal is to properly classify the type of water damage that has occurred. If you have just had water damage, it is important to know how to classify it so that you can get the right help. If you find yourself in this situation, call us at SERVPRO of Mid-City San Diego and we will help you out.
How Do I Install a New Toilet?
11/1/2022 (Permalink)
What Is the Best Way to Install a New Toilet?
Replacing a toilet at home in San Diego is fairly simple. Before you do this, however, make sure that you have all the parts on hand for installation—and double-check that you're using the correct parts! Once your new toilet is in place, you'll need to run some water through it to flush out any debris from manufacturing or shipping (which could affect how well everything flushes). Here is how you install a new toilet.
Install the new wax ring
Use a wax ring kit, which includes a wax ring and the necessary bolts to install it. Put the wax ring on the flange, making sure that it is centered and sitting flat against the bottom of your toilet bowl. You can use a small amount of plumber’s putty if needed to help keep it in place as you set your toilet bowl onto it later on in this process of installing a new toilet (this is also known as “setting”).
Slide your new toilet into place over top of your old one and gently lower it down until all four legs are resting firmly on top of their corresponding base bolts or screws—you should hear three distinct clicks when they hit home!
Tighten the bolts
Once the bolts are in place, you can tighten them using a wrench or pliers. If you’re using a torque wrench (which is highly recommended), be sure to use it to tighten the bolts.
If there were any minor leaks around the base of your toilet before installation, this should have fixed those problems and stopped them from happening again.
You may notice that there are two types of bolts: one type has a flat edge while the other has an indented edge on one side and an indented groove on its opposite side. These different bolt types ensure that your toilet will drain properly into either hooked-up drains or into P-traps with vents attached to them respectively.
Connect the water supply line
Attach the water supply line to the toilet. Tighten the nut on the bottom of your water supply line, making sure it's not kinked or pinched. Then, look for any leaks that may indicate a problem with your toilet installation.
Test Your Work
After you've completed the installation and tested your work, it's time to verify that everything is working properly. Check for leaks first by placing a bowl under the toilet base. If there are any drips, tighten any loose nuts on the underside of the tank or connect some leak-stopping putty if needed.
Next, flush your toilet and make sure that it performs as expected every time. It should fill completely with water before draining completely as well as drain completely in less than four seconds. If these steps don't seem right to you or if there are any other issues with performance, call a plumber immediately!
Replacing a toilet at home is simple
For the most part, replacing a toilet is a very simple process. However, before you start loosening bolts and unscrewing nuts, it's important to make sure not to over tighten them. Over tightening can cause cracks in the porcelain and lead to leaks over time.
To avoid this problem, use either a wrench or pliers to tighten your bolts after everything else has been put together. Once the seat is installed and all other parts are in place, re-tighten all of them so they're snug but not too tight.
Replacing a toilet is not a difficult project and can be accomplished by anyone with a few simple tools. This guide is designed to help make the process as easy as possible by walking you through each step of the way. By following these instructions and being mindful of what you are doing, you will be able to install a new toilet in no time at all!
4 Steps To Restoring Your Home After a Leaky Water Heater
5/10/2022 (Permalink)
After a Leaky Water Heater, Follow These 4 Steps to Restore Your Home
A leaking water heater in City Heights, CA, can quickly become an emergency. Not only is the leak likely to become worse over time, but a continuous stream of warm water can easily become a breeding ground for mold and bacteria. Luckily, you can minimize damage to your home by addressing your failed water heater as soon as you notice a problem. By following these steps and knowing what to expect throughout the restoration process, your home will be back to new in no time.
1. Shut Off the Water
It is important to stop the source of the water. First, go to the circuit box and cut the electrical power to the area. Next, turn the water supply valve on the water heater to the off position. If there are any electrical hazards, such as sockets or wires underwater, do not enter the area. Instead, turn off the water to the house and call an electrician for assistance.
2. Extract the Water
Regardless of how many gallons of water have found their way onto your floor, water damage remediation experts can quickly remove the water and dry the area. Many professionals in City Heights, CA, use specialized machines to extract the water caused by a leaking water heater. Specialists may also use industrialized blowers to thoroughly dry any remaining moisture.
3. Inspect the Broken Water Heater
Once the immediate problems have been addressed, experts will inspect your water heater to determine if it can be repaired or if it needs to be replaced. The team will explain your options and may even work with your insurance company to help streamline the repair or replacement process.
4. Work With Restoration Services
Your home must be restored to its previous condition. If your floors, walls, or other building components are not salvageable, the team may install new materials. Experts may apply new paint or make other repairs before the job is complete.
A leaking water heater can cause damage to your home. Fortunately, with a team of experts, your home can be restored to its original condition in the least amount of time.
4 Typical Areas Where Mold Is Found in Commercial Buildings
3/23/2022 (Permalink)
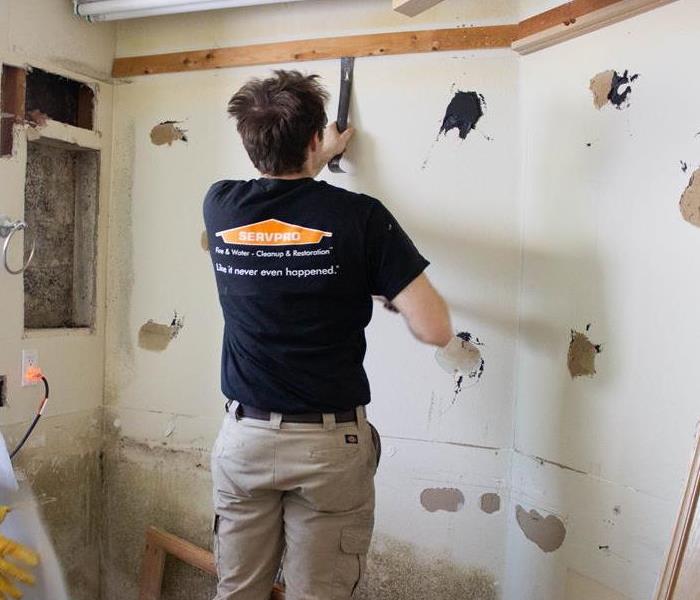 SERVPRO doesn't just remove materials affected by water damage and mold, but we get to source of the problem to prevent ongoing damage!
Even when regular cleaning and caretaking is a part of your everyday lifestyle as a building owner in San Diego, CA keeping mold away forever is near to impossible. It’s bound to show up in areas where water is commonly used and the mildew smell alone can alert you to its whereabouts. However, if no visible mold is apparent and you need to find its location before resorting to mold testing, here are four typical areas where mold can be found in commercial properties.
- Look for mold near water heaters and air-conditioning units. When coolers are used all day, specifically in large buildings where they’re often in constant use, heavy condensation and water leaks can frequently occur. Since this water lingers and seeps into the surrounding walls or floors, mold can begin to grow in unforeseen places like under the carpet or behind drywall.
- Search below bathroom and kitchen sinks. Bathrooms and kitchens see their fair share of consistent water usage, leaving a mildew smell without necessarily displaying visible mold to the naked eye. This is often the case because it’s hiding below the sink where any leaks can spring up, plumbing can become loose or caulking can go bad, needing replacement.
- Check the walls beneath leaky windows. If your building in San Diego, CA sees ample rainfall every year, you’re more likely to find mold growing below your windows. Poor insulation or leaky window frames are high areas for trapped moisture.
- Investigate basement floors or cellars that have been previously flooded. Any low-level rooms like basements that have endured flood damage leave a lot of damp walls and floor space if they’re not dried or replaced properly by professionals. Given that these areas are generally dark, receiving little sunlight or fresh air, there’s a high probability mold is present.
If no visible mold can be found and you’re intending to have mold testing done in your building, try looking in any of these typical areas where mold grows frequently. When the mildew smell can’t give away its location, any of these areas may reveal the mold you’re looking for.
The Importance of Containment During Mold Removal
3/9/2022 (Permalink)
 SERVPRO takes every measure to ensure that excess moisture is removed from water-damaged areas!
When mold starts to spread in your San Diego, CA business after a flood or other types of water disaster, you may not be sure how to treat or remove it. Mold cleanup can be a complicated affair, and the mold may even reappear if it is not handled properly the first time. Having mold-damaged areas professionally inspected and contained is one way to ensure the problem is eradicated quickly.
Mold Can Grow Rapidly
If mold is not contained during the cleanup process, mold spores can travel through the air and into other areas, where they might find new breeding grounds. Some of the most common, unseen spaces usually include:
- Storage space in the basement
- Interior walls damaged by water
- Inside of your building’s heating and cooling system
Because these spores can travel so easily, bringing in a company that specializes in mold remediation can help prevent further growth. Since mold can begin to grow in its new environment as soon as 48 hours after attaching, calling in professional services right away can be an important step in cleanup.
Mold Can Break Free From Damaged Drywall and Carpeting
As mold-damaged substances like drywall and carpeting are removed from your business during mold cleanup, the spores can become airborne. Once this happens, the fungus can attack other porous materials, such as acoustic ceilings and tile flooring. Keeping mold-infested substances contained can prevent spores from finding a new foothold in other areas of your business.
Commercial Cleansers May Not Kill Mold Completely
Calling for professional mold containment can be an important step in preventing future issues. Mold contamination may not always respond to commercial cleansers, and the mold presence in your building may require more drastic treatment. Negative air pressure and specialized chambers can isolate areas that have been affected by mold and prevent it from reforming and spreading.
Mold cleanup can be a complicated process, especially when it comes to keeping affected areas contained. Leaving these areas closed off and calling in professional mold remediation services can help prevent the spread of mold and restore your San Diego, CA business to its former glory.
The First Steps To Take When Your Kitchen Floods
1/10/2022 (Permalink)
Steps To Take If Your Kitchen Floods
There are a few clear signs that you have a leak under your kitchen sink. You may hear drips of water even after you turn off the faucet. The bottom of your cabinet may be wet. If the leak is big, you may even see some flooding. Once you notice these signs in your home in Clay Park, CA, there are three steps you need to take immediately in order to prevent as much damage to your kitchen as possible.
1. Shut Off Water
The less water you have bursting out of the leaky pipe, the less damage it can cause. To halt the progression of the problem, turn off the water at its source. Cut off the supply on the wall, or, if that’s not possible, turn it off at the main. By preventing the flow of water in the home, you can minimize damage.
2. Call Insurance Agent
After the water feeding the flooding has ceased, it is time to call your insurance company to report the problem. You can file a claim for any damage caused by a sudden pipe leak. As long as you can prove it is not a long-term problem and it is not a result of your negligence, your homeowner’s policy is likely to cover the costs of repairing the damage.
3. Call Repair Personnel
In the interest of preventing further damage to your home, place a call to water restoration specialists. These experts assess the damage, propose possible solutions and take your kitchen repair from water extraction to structure restoration. If they start the repairs quickly, you may be able to avoid secondary damage such as mold growth in your home.
A leak in your kitchen can lead to flooding and significant water damage. When you notice a leak has occurred under your kitchen sink, shut off the water source and call your insurance company and repair specialists to get your home back to normal as soon as possible.


 24/7 Emergency Service